
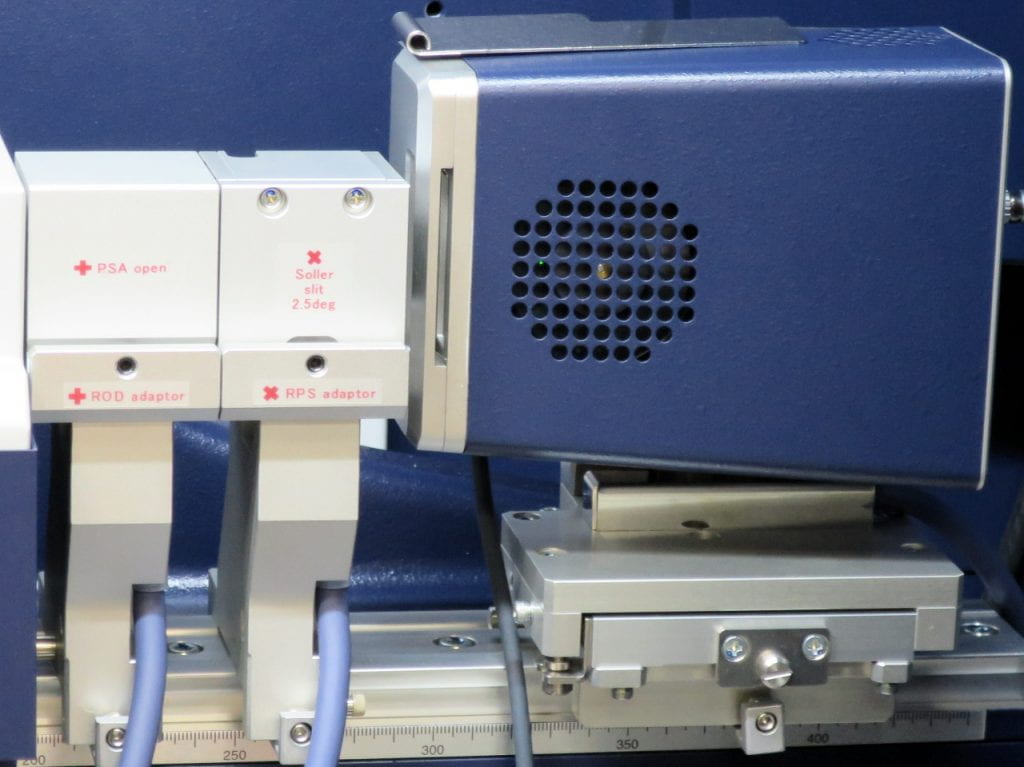
The HyPix 400 is a solid-state (silicon), 96 x 385 pixel array detector. Each pixel is 100 x 100 μm across, or about 0.003° at the usual 30 cm goniometer radius. The array allows 0d, 1d, and 2d data acquisition, scanning, and quick snapshots of small to moderate angular ranges. Time- or temperature-resolved sequences of results can be taken. It can be mounted in either horizontal (shown here) or vertical orientations.

This is the horizontal mount for the detector, here shown upside-down. There are four bolts that hold the detector on the mount.
Don’t touch any of the other bolts or screws!
Here the detector is mounted vertically, meaning the wide axis of the detector array is vertical. It requires a special vertical mount.

The vertical mount is a bit more complex than the horizontal one, because it can interfere with things on the left goniometer arm at high 2Θ angles. To prevent damage, there’s a goniometer arm movement limit switch: when the switch is pressed, the goniometer stops moving, thus preventing damage. As with the horizontal mount, the detector attaches with four bolts. Don’t touch any of the other bolts or screws!
In addition to two wires connected to the right side of the detector, and the usual blue wire on the mount, there is a long wire with a white plug on the end. The white plug has to be connected to its counterpart socket on the left goniometer arm, as shown below.
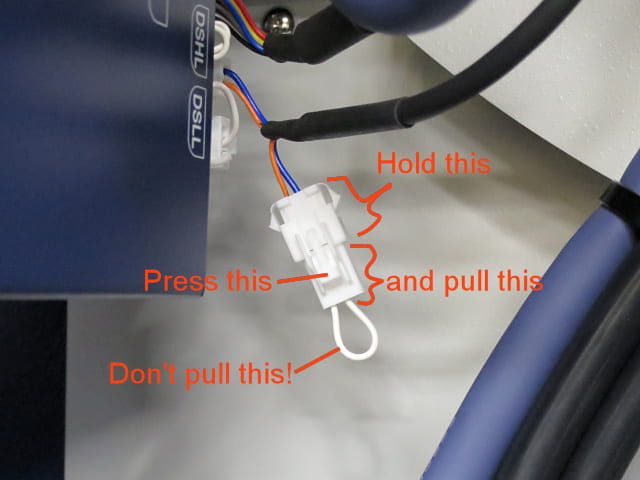
This is the socket where the limit switch wire plugs in.
NOTICE that the socket already has a plug in it. The plug has a white wire loop that electrically shorts the goniometer movement circuit, telling the goniometer that it’s OK to move anywhere it wants. You need to remove the plug so goniometer movement is instead allowed or forbidden by the goniometer movement switch, on the vertical detector mount.
Hold the big socket part, press down the little release lever, and pull out the small plug part. Don’t pull out the wire loop! Then, plug in the wire from the limit switch on the vertical detector mount. When using the horizontal detector mount, remember to put the shorting plug back in, or the goniometer won’t move.
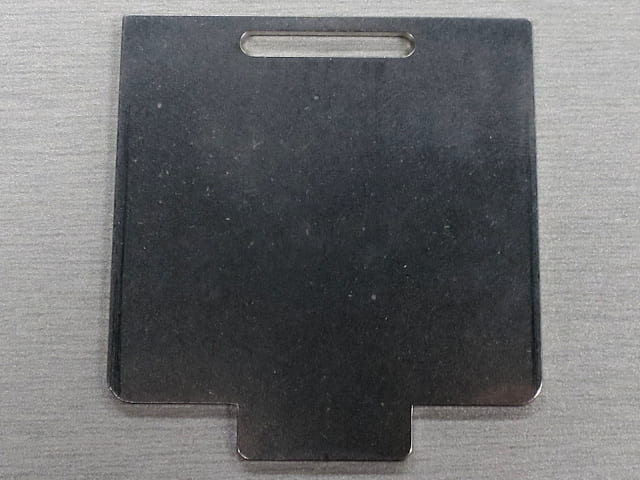
The detector is extremely expensive, and the detector array is extremely fragile. When working with the detector, always install this shield to protect the array!
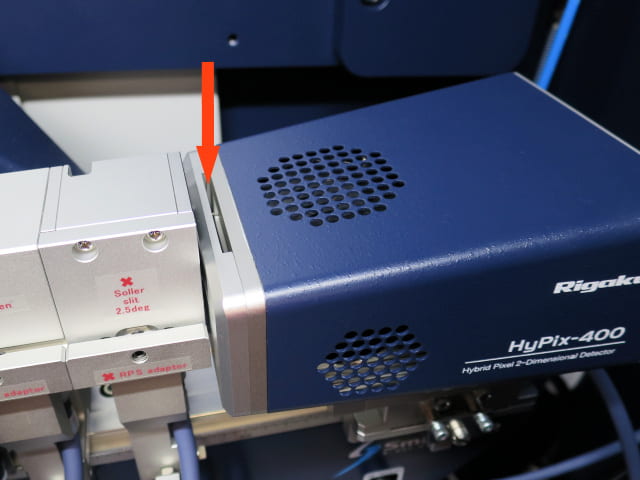
This shows where to put in the shield. Don’t forget to take it out before trying to detect X-rays.
