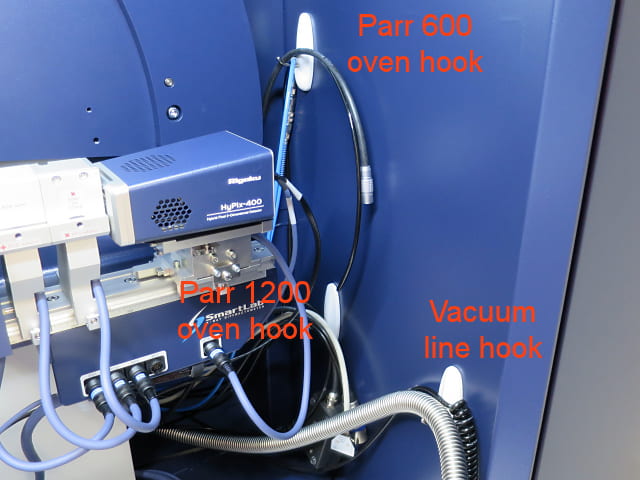
There are a lot of wires and hoses inside the XRD. The hooks are mostly to get them off the floor of the XRD housing, and secondarily to organize them. A tidy workspace prevents accidents.
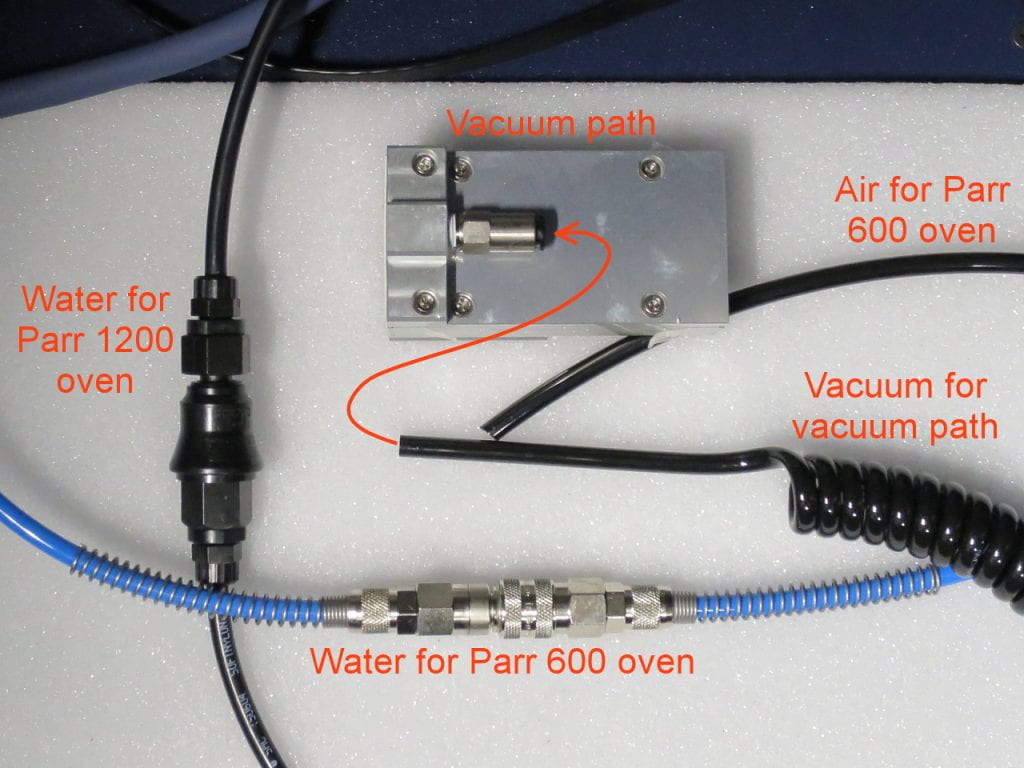
This image shows the quick disconnects for the water tubes that go to the two ovens. The quick disconnects should always be stored connected, to keep dust out. Because each disconnect type is different, they can’t be connected the wrong way to the ovens.
The purpose of the vacuum path is to increase the X-ray intensity and reduce scattering at the detector for small angle scattering analyses. It’s basically a hole with plastic windows at each end. It’s hard for me to believe that plastic windows scatter less than air, but there you have it. The coiled hose connects to the small, silver vacuum pump.
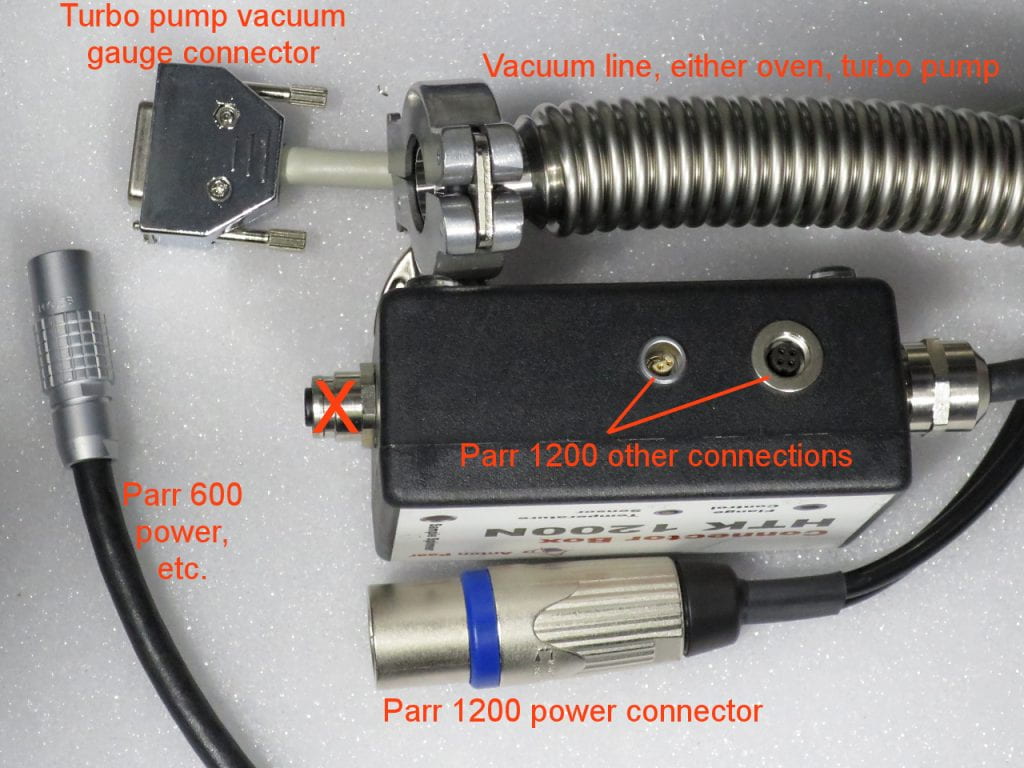
The metal vacuum line connects to either oven, or to the turbo pump out port, and is pumped by the large, light-gray vacuum pump.
The Parr 600 oven has only one wire connection, containing power and temperature sensor leads.
In the XRD housing the Parr 1200 oven has a power cable, and the black box to which two cables from the oven connect.
The D connector goes to the turbo pump vacuum gauge (if used).
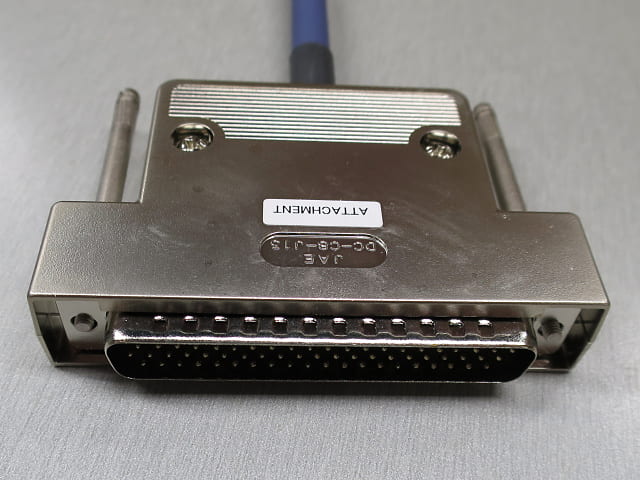
Every sample stage has a connector that looks like this. It connects to a port below and to the left of the door sill. See below.
To change stage plugs, flip-up the plug cover. If the XRD is on, an alarm may sound, but don’t worry about it. Unscrew by hand the usual attachment bolts, exchange the plug, and screw in the new attachment bolts. Not too tight!

Flip-down the cover to turn off the annoying alarm. Also, the XRD won’t run if the cover is up.

The Hypix detector has two mounts for two possible orientations: vertical and horizontal. There is not much to the horizontal mount, it just has one blue wire that connects to the plug panel under the detector.
The vertical mount is a bit more complex, because it can interfere with things on the left goniometer arm at high diffraction angles. To prevent damage, there’s a goniometer arm movement limit switch: when the switch is pressed, the goniometer stops moving, thus preventing damage.
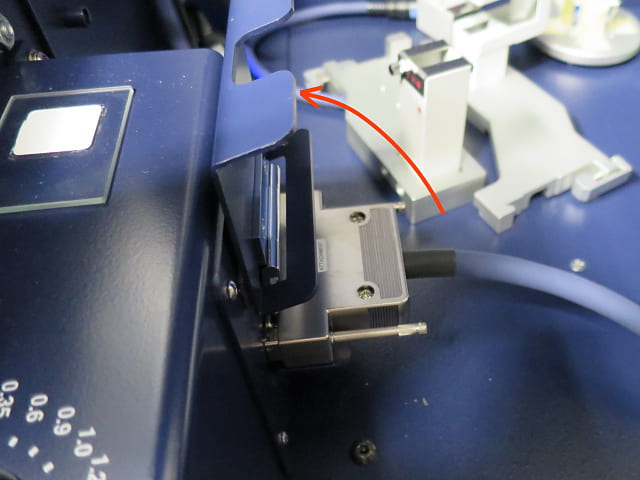
The white plug has to be connected to its counterpart socket on the left goniometer arm, shown below.
This is the socket where the limit switch wire plugs in.
NOTICE that the socket already has a plug in it. The plug has a white wire loop that electrically shorts the goniometer movement circuit, telling the goniometer that it’s OK to move. You need to remove the plug so goniometer movement is instead allowed or forbidden by the goniometer movement switch, on the vertical detector mount.
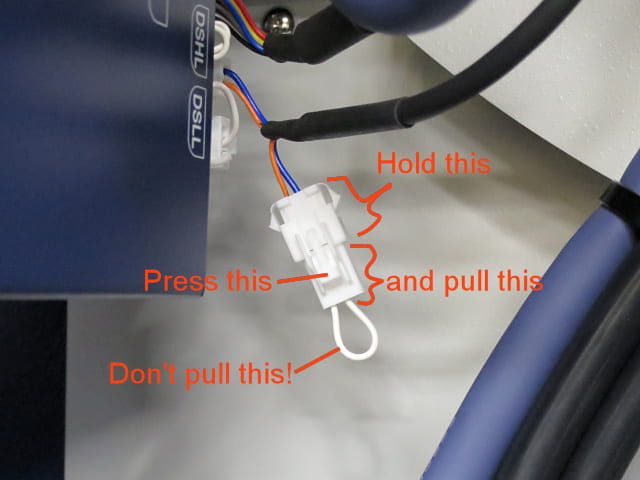
Hold the big socket part, press down the little release lever, and pull out the small plug part. Don’t pull out the wire loop. Then, plug in the wire from the switch on the vertical detector mount. When using the horizontal detector mount, remember to plug the shorting loop back in, or the goniometer won’t move.

These are the two vacuum pumps. The small, silver pump is just for the small angle X-ray scattering vacuum path. The large, light-gray pump is for either of the two ovens directly, or for backing the turbo pump. Arrows point at the on/off switches.
These draw a lot of power and can’t be on the same circuit and turned on at the same time. In fact, they should never be needed at the same time.
