Focusing the Microscope
Every time you use a microscope you should adjust the focus for your eyes. Many people complain about eye strain using microscopes, but complaints are usually due to incorrect adjustment. The only exceptions are people with eyes that have non-parallel lines of sight. If you have this condition, or if you refuse to properly adjust your microscope, use just one eye. Adjustment steps:
- Adjust the width of the eyepieces by using both hands to gently pull or push the eyepiece base plate (Olympus microscopes), or gently rotate the ocular bases to move them farther apart or closer together.
- Focus the cross hairs for the right eye using the adjustment ring on the right ocular lens.
- Focus the view for the right eye using the focusing knobs toward the back of the microscope. These raise and lower the stage.
- Focus the view for the left eye using the adjustment ring on the left ocular lens.
Centering the Optics
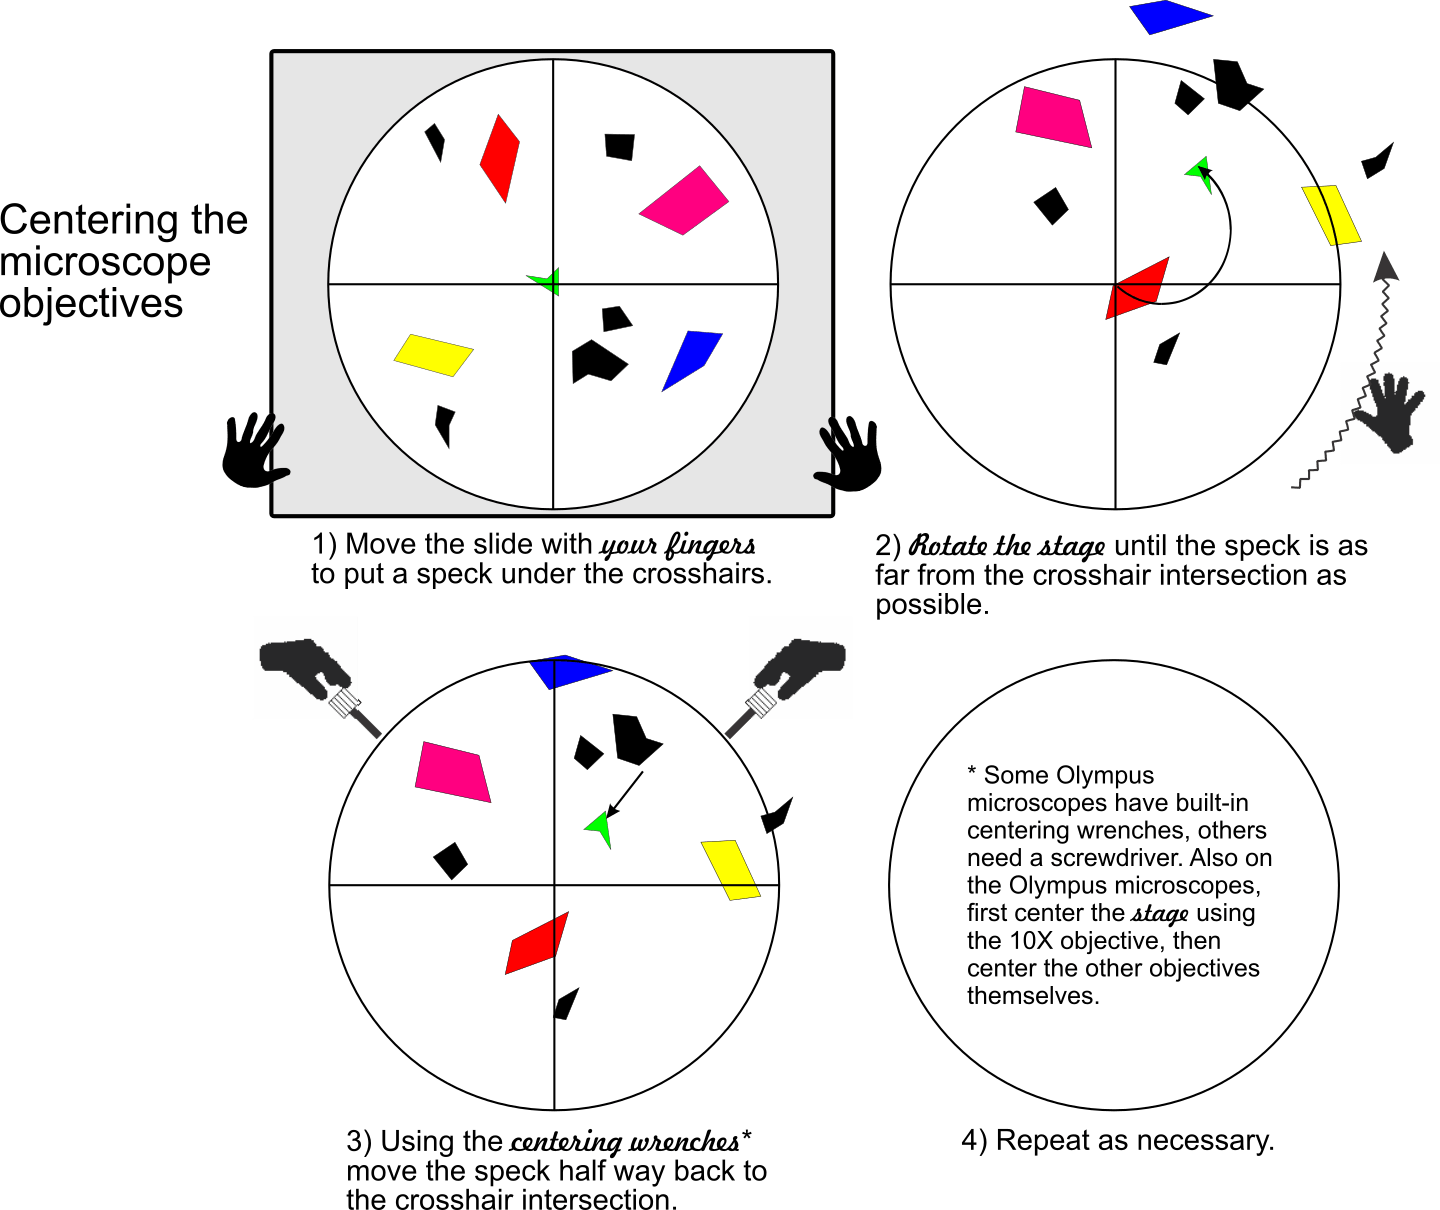
Getting Optic Figures
Looking for grains that yield centered optic figures:
- Isotropic and opaque minerals have no optic figures!
- For optic axis figures on uniaxial and biaxial minerals: Find grains with minimum, preferably zero, birefringence.
- For flash figures, uniaxial and biaxial minerals: Find grains with maximum birefringence.
- BXA and BXO figures, biaxial minerals only: Difficult to find except for flat-lying sheet silicate plates. These grains have intermediate birefringence.
Three things control the birefringence that you see
- The difference between the maximum and minimum refractive indices (the greater the difference, the higher the birefringence).
- The thickness of the grain (the thicker the grain, the higher the birefringence).
- The grain orientation (birefringence ranges from zero if the optic axis is vertical, to a maximum when the optic axis (uniaxial) or axes (biaxial) are parallel to the stage).
- In thin sections, thickness is more or less constant (30 μm), so birefringence is only controlled by 1 and 3.
Setting up to get a figure
- Find the grain you want to get a figure on.
- Swing in the high-power objective (40 or 63X). Focus on the grain. NOTE! It is imperative that this objective be centered!
- Insert the analyzer (upper polarizing filter).
- If your microscope has one, swing in the substage condenser lens.
- Do one of the following: A) Swing in the Bertrand lens (works best for large, isolated grains). B) Remove the left ocular and sight down the axis of the ocular tube (works best, after some practice, for small grains or grains crowded together with others). Inserting a pinhole into the left ocular tube can help.
- Make your optic figure observation.
- Backtrack through the steps to get back to normal observation
