Using images will probably be the most frustrating thing you’ll do in WordPress. Getting them where you want them, in the right size, and putting text where you want it in relation to the image can be very time consuming. You will save a lot of time if you re-size and edit your image using photo editing software like Photoshop before you upload you images to WordPress especially for the Slider images.
It just takes trial and error, and a LOT of patience!
When you upload a photo, WordPress “crunches” your image and produces 3 versions of your photo – a 150 x 150 thumbnail, a medium and large/full-size version. If your photo is a different size WordPress will “crop” it for you. For most standard format images you insert into a page or post it probably won’t make a difference. But the Slider will crop an image to a height of about 320 pixels high, and it will usually take the section out of the middle of your photo. So if you have an image that’s a standard format, the image that displays in the Slider may not look the way you want. You may have the same issue with featured images and thumbnails.
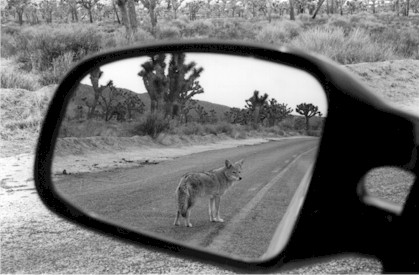
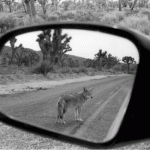
The original size of this photo was 420 x 275 pixels, a fairly standard format. The following images give you an idea of how WordPress “crunches” your photos. You can see that the Large/Full Size and the Medium look very similar, but the Thumbnail gets cropped, and the Slider image gets cropped in a strange place.
Original/Full Size Medium
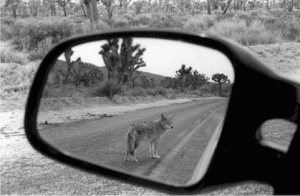
Thumbnail Slider
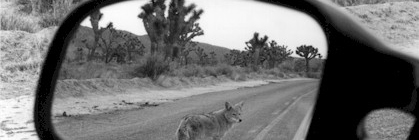
For the Slider, I would edit the image in Photoshop to look more like this:
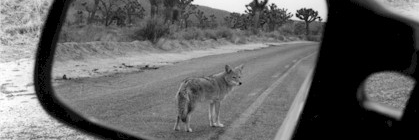
Photo courtesy of Ginny Solomon.
For your Slider, take some time to choose a photo that will work well in the horizontally elongated format – photos that will still look good and highlight what you desire after it’s cropped. See HERE for more information on how to create a Slider.
OPTIMUM PHOTO SIZES
Thumbnails: 150 x 150 pixels
Medium: 300 x 400 pixels
Large: 1024 x 1024 pixels
Slider images: 1170 x 320 pixels
The Media Library
Before you can insert a photo in your page or post, you must upload the image into your Media Library.
Dashboard | Media| Library will take you the Media Library.

At the top of the screen, click on the <Add New> button.
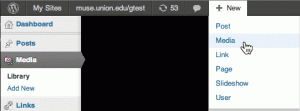
You can also click on +New in the Admin Bar and choose Media.

In the Upload New Media window you can either drag your photos into the window from a folder on your desktop, or click on the <Select Files> button to navigate to the image on your computer, then press the <Open> button to upload your image.
When you can see a small thumbnail of the image at the bottom of the window the image has finished uploading and is now in your Media Library.
Navigate back to the Media Library by going to Dashboard | Media | Library and you’ll see a list of your photos with the latest one you uploaded appearing first.
To insert a photo:
The process for inserting a photo is the same for either a page or post.
In the body of text, place your curser where you’d like to insert the photo.
Click on the <Add Media> button above the text formatting bar. ![]()

Click on a photo to select it.
In the Attachment Details window, choose your Alignment, Link and Size in the Attachment Display Settings Area.
Click on the <Insert into Page> button. ![]()
The Attachment Display Settings

Alignment
Alignment Left will make your image left-justified and allow you add text to the side of the image:

Alignment Right will put the image on the right, and you can also add text beside the image:
Alignment Center will put your image in the center, but you can only put text above or below the image. The following example also has the text centered.
If you choose Alignment None you can put the image wherever you want within your text but again, you won’t be able to add text beside the image.

Linking your photo:

When you hover your mouse over the image in your page or post the curser will turn into the hand which indicates that the image is a link.
Linking to the Media File will take you to the page that WordPress created with a full size version of the image that you uploaded into your Media Library.
Linking to the Attachment Page will take you to a page that WordPress created with the same size image that you posted.
You can link to a Custom URL by entering in the URL address in the text box.
Changing the size of your image:
 You have 3-4 options here depending on the size of your uploaded image.
Thumbnails are always 150×150 pixels, and WordPress will “intuitively” crop the image for you. Sometimes the image may be cropped where you don’t want it cropped, so the best bet is to use photo editing software like Photoshop to edit the image and then upload it to your Media Library to use.
Medium will usually be about 300×200 pixels but it will be dependent on the format and size of the original image.
Large and Full Size are sometimes combined depending on the size of the image you uploaded. In the examples of Alignment above, the photo I uploaded was very large (3502×2408 pixels) so WordPress split it out and gives a separate Large and Full Size version.
To create a Featured Image:
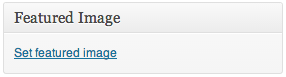 When you’re editing a page, find the Featured Image section in the lower right corner.
Click on the link to Set Featured Image. This will open up your Media Library where you can select the photo you want to be displayed in a Content Area on your Homepage.
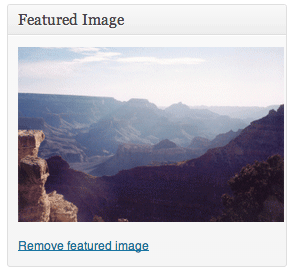
In the Media Library, click on the photo to select it.
Click on the <Set Featured Image> button to save it. ![]() and the photo will appear as the Featured Image.
and the photo will appear as the Featured Image.
Don’t forget to <Update> the changes you made to the page. ![]()
If you wish to remove the Featured Image, simply click on the Remove featured image link and Update the change. ![]()
When you select this page to use in your Homepage Content Area, the Featured Image you’ve selected will be displayed with a link to this page. The featured image will not appear when you view the page, it will appear only in the Content Area of your Homepage. Keep in mind that the format of the photo in the Content Area may not match your original format and WordPress may have cropped it. You may want to edit the image using photo editing software like Photoshop and then uploading the new edited image to your Media Library.