Creating an animation and exporting it to a video in SketchUp
This tutorial was made from information based upon the SketchUp website. Animations are a series of rendered images that are displayed one after another tour of a model. To create an animation:
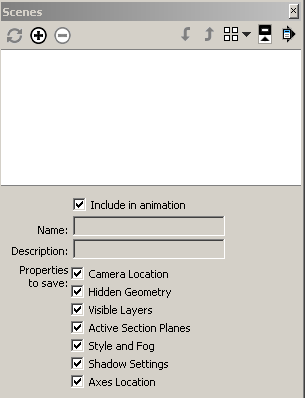
- Select Window > Scenes. The Scenes Manager displays.
- Type the name and a description of the scene in the ‘Name’ field. For example, type “Front View” if the scene represents the front view of a building. Using names can help in figuring out how to arrange your scenes to create a nice animation in the end.
- For the properties to save section, for most projects you will leave all the boxes checked.
- Click the Add Scene button (
 ) to add the scene. A scene tab is added above the Drawing Window. The scene tab has the name of the scene you assigned in a previous step.
 - Move to a new location of the model using either the Camera tools or Walkthrough tools. Using the Walk tool is recommended as it gives you a more natural feel to movement when the animation is done.
- Repeat to add additional scenes.
- Right click on the first scene and select Play Animation. The animation cycles through each scene.

- Next we want to create a video to use in a video editor.
- Select the File > Export > Animation menu item. The Export Animation dialog box is displayed.
- Select the export type from the ‘Export type’ drop-down list.
- Enter the name for the exported file.
- Click on the Options button. The Animation Export Options dialog box is displayed.
- Modify animation export options as necessary, you may want to change the frame rate to either 29.97 or 30.
- Click on the Export button to export the presentation as an animation.
- You can them import the video as media to Camtasia and use it from there.


