Be sure the XRD is turned on and that the controller has set itself to the rest position at 12° 2Θ. Start the Datascan program from the computer desktop or from the START program list.

1) Click on the Controller button to check that controller values are OK.
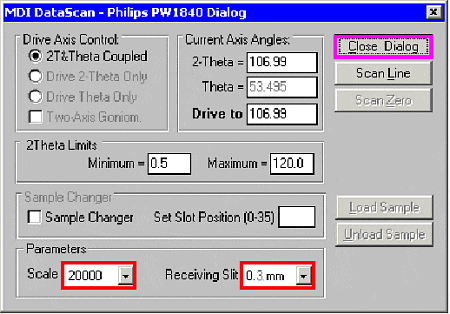
2) Always set the Receiving Slit to 0.3 mm. Narrower slit widths are supposed to increase peak resolution at the expense of peak height, but for reasons I don’t understand the smaller slit widths don’t increase resolution, they just decrease peak height. Close the dialog box. NOTE: This instrument does not actually have a slit. Changing the slit width just changes the number of silicon detector elements that are turned on or off.
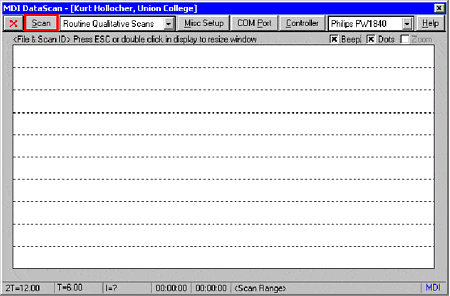
3) Click on the Scan button to set up the scan information.

4) Click on the Files –> button to tell the program where to save your data files. For Mineralogy class this will be the MINERALO folder. This is an ancient system, and file names are limited to 8 characters. Don’t like that? Use the other XRD.
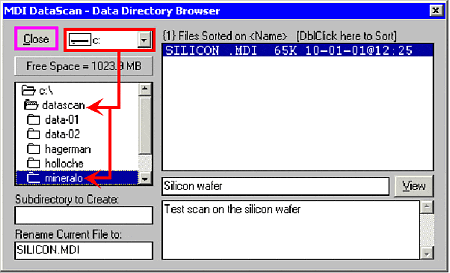
5) Select the folder to which you want to save your files. This example (for Mineralogy classes) is: hard disk c:, datascan folder, MINERALO folder. You can also make new folders under Subdirectory to Create. Close the dialog box.

6) Select a scan setup from the list (example is Mineralogy standard for most scans done in Mineralogy courses). You can Setup your own scan variables (2Θ start value, 2Θ end value, scan speed, etc.). Be sure to save your new setup file under a new name so you don’t mess up someone else’s setup file.

7) Enter your File ID (file name for the scan data file). Again, you are restricted to 8 characters. Optionally, you can enter a brief descriptive Scan ID, and/or Notes.

8) Be sure your sample is in place and the shutter is open!!! Press Start Scan to start the scan.
If you start the scan and see a count rate of zero, you probably haven’t opened the shutter.

9) Watch your data come in. To stop data acquisition, press the Click Here to Stop button. During scan, the bottom row gives the 2Θ value, the Θ value, the X-ray intensity in counts per second, the time elapsed since start of the scan, and the time left to scan completion. The initial vertical scale shown here is 2000 counts per second (set elsewhere). It adjusts automatically to fit the highest peak, up to a maximum of the Scale parameter given above. The maximum intensity is given as Max I.
WARNING: The scan data file is NOT SAVED in its final form until the goniometer resets to its 12° 2Θ rest position. Don’t do anything with Datascan until the goniometer control box reads 12° 2Θ. You can play with Jade and other programs, however.
