This thing is used to split off rock parts you don’t want, split the parts you want into manageable pieces (<10 cm), and then to crush those pieces to <6 mm size. Samples larger than 25 cm across won’t fit between the splitting wedges, so they have to be broken up some other way. The wedges and crushing plates are made of high-purity tungsten carbide, with the usual metallic cobalt binder. Other than a few chips, we have noticed no significant wear on the tungsten carbide tool surfaces after processing probably thousands of samples. In addition, analyses of hard, quartz-rich rocks that have been crushed on this system are commonly found to have <1 ppm cobalt. We don’t think the tungsten carbide crushing faces contribute any significant amount tungsten, cobalt, or other trace elements to common rock samples. Manual.
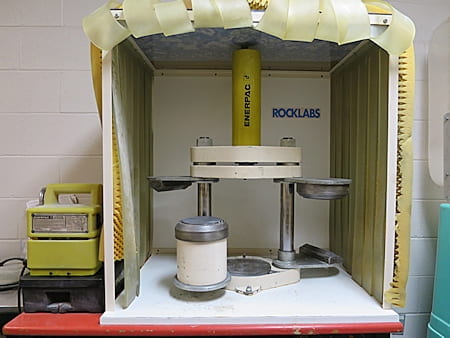
This is the RockLabs hydraulic crusher/splitter system with the vinyl “safety” flaps up. The hydraulic pump is the yellow thing on the left. The on-off switch is on the right side of the pump, and the up-down control lever is on the top of the pump, behind the yellow handle on top. Inside the enclosure, the yellow cylinder is the hydraulic ram. There are three thick steel plates, but only the middle one moves.
The press is basically a hydraulic ram, with two pairs of tungsten carbide tools. The ram has a maximum force of ~29 tons, which will crush any rock that will fit. The tungsten carbide tools are used in pairs: either the two wedges or the two flat plates. NEVER USE DIFFERENT TOOLS TOGETHER, NEVER MOVE THE TOOLS TOGETHER WITHOUT A ROCK BETWEEN THEM. The wedges split big rocks into smaller ones, and split off sample parts you don’t want. The plates are for squashing rocks <10 cm across into smaller pieces, usually to pass through a 6 mm sieve. The two tool pairs swing in and out of position. Spring-loaded pins can lock them into position, but they are usually bent or jammed with dust and don’t work. Be careful to keep the tool pair you are using pushed back against their stops.
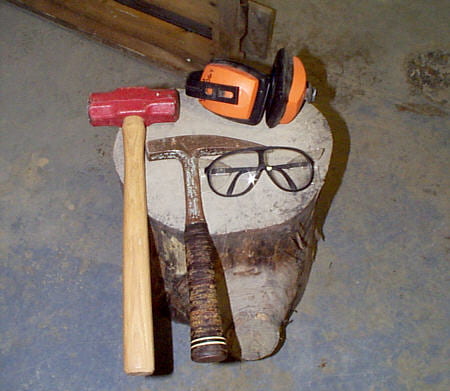
It’s best to break the samples into <25 cm pieces in the field, but otherwise use a hammer of appropriate size on the wood stump. Breaking rocks is a loud process, and flying rock chips are common. You must use safety equipment, particularly goggles (eyeglasses are not enough), hearing protection, and a dust mask.
The pump is operated the same way for both the crusher and splitter. A lever on top of the pump, behind the yellow handle, has three positions: to the right, the ram will go up; to the left, the ram will go down to crush or split your sample; the middle is neutral, with the ram piston depressurized. Regardless of the lever position, the pump needs to be turned on. The rocker switch, on the right side of the pump has three positions. One position manually turns on the pump, but releases and turns it off when you let go. The middle switch position is off. The third switch position sends pump control to the foot switch, which is the normal position.
Samples coming in from the field may have to be scrubbed and rinsed with water, then air dried, to remove contaminating dust and dirt. Don’t crush wet samples! Analyzed samples should be free of weathered parts, lichen, veins, altered joints, and other potential contaminating factors. these can be broken off with the splitter tools. The splitter wedges are here shown rotated into place (the crusher plates have been rotated off to the sides). They can also be used to break a large samples into pieces <10 cm across for crushing. Larger pieces won’t fit between the flat plates and may damage the soft plastic pieces that fits over the lower crusher plate. If the ram seems to move slowly when you run the pump, or the ram seems to have a hard time moving up and down, spray or wipe some WD40 onto the guide rods.

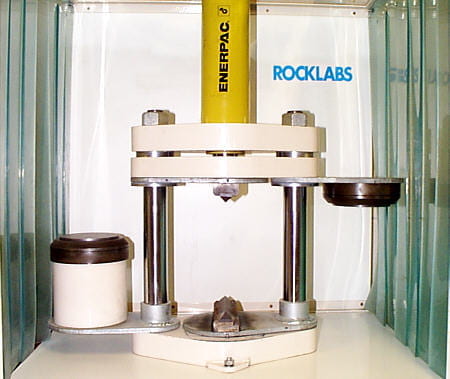
The flat crusher tools are here shown rotated into place (the splitter tools have been rotated around behind). Notice that there isn’t a huge amount of space between the plates

This is the electric pump that runs the ram. The lever is on top, toward the back, and the 3-way rocker switch is on the right side.

This shows the lever that controls vertical ram movement. The lever as shown will move the ram up, when the pump is on. Always stop the pump before the reaches the extreme top or bottom position. That puts unnecessary stress on the hydraulic system and ram supports. If it does reach the limits, move the lever to the middle, neutral position to release the pressure. Never apply more pressure than you need to crush your sample, because excess pressure just compresses the powder into hard lumps. Never let the tool faces touch each other, they are brittle ceramics and will break.

Here is the foot switch, located under the table. You stick your foot into the big side and push down to turn the pump on. Lift your foot up to turn it off again. The lever on top of the pump controls the direction the ram moves. After a few tries it will become easy.

This shows the plate tools swung into position, with the black plastic piece fitted over the lower plate. The plastic piece keeps crushed rock bits from falling onto the table, and help funnel crushed pieces into the sieve. Pieces that need more crushing are kept in the plastic box, and newly crushed material goes into the sieve. Pieces that stay on top of the sieve go back to the plastic box for another crushing-sieving cycle. Repeat until the whole rock passes through the sieve.
Cleaning the crusher itself is very important to avoid cross-contamination between samples. Such contamination can result in inaccurate, possibly meaningless data later on. Clean the device before crushing anything, and after crushing each sample, including the last one. First, vacuum up loose chips and dust from the table, tools, and other surfaces as necessary. Then use a damp sponge to wipe down the crushing surfaces, wedges, all horizontal surfaces, and other places as necessary. The sieves, plastic boxes, and black plastic parts also need to be cleaned and dried. Use the big drying oven, set to 60°C or so, to speed up drying. A lot of expense and work went into collecting these samples, and a lot more will go into analyzing them. Don’t mess up the project at this stage.
After you finish, clean up after yourself. Clean the hydraulic press, sieves, and so on as if you were preparing for another of your own samples. Also sweep the floor and possibly vacuum to get stray rock chips and dust.

Your sieved, crushed samples should be stored in a container, such as a plastic or paper sample bag. A split is usually taken from this for powdering, which is what is analyzed.

After many hours of crushing you will look longingly at the exit door.
That’s enough of that. Get back to work!
