Nesosilicate mineral group
~(Fe2+,Mg, Zn)2(Al,Fe3+,Mg,Ti)9O6[(Si,Al)O4]4(O,OH)2
Crystal class: 2/m (monoclinic, pseudo-orthorhombic)
Space group: C2/m
This model was constructed as part of an advanced mineralogy course, taught by Professor Howard W. Jaffe, Department of Geosciences, University of Massachusetts, in 1984. One of our many tasks was to build a crystal structure model out of foam rubber balls (anions) and styrofoam balls (cations). The models were held together mostly with thin steel welding rod, which was straight, ductile, and strong. The photos below show different views of the model. The model was built so that the top could be removed to see some of the interior structure, as seen in some of the photos. Note that some of the oxygens are labeled O1 through O5, to aid identification. I am afraid I have no record of the reference from which the atomic positions were taken.

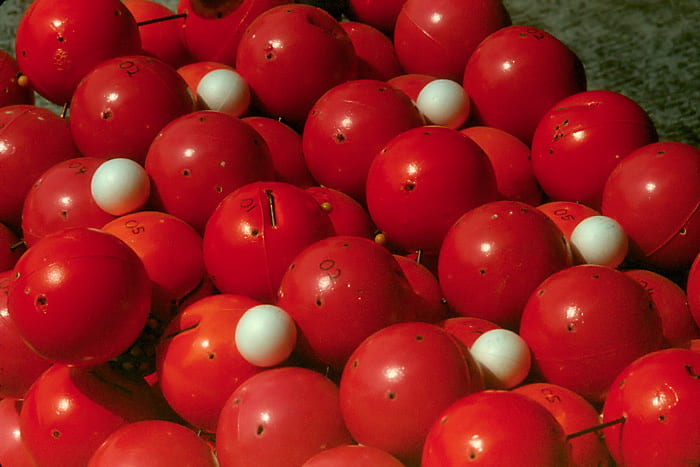
 Looking almost down the b axis, a is to the left, c is up. Looking almost down the b axis, a is to the left, c is up. |
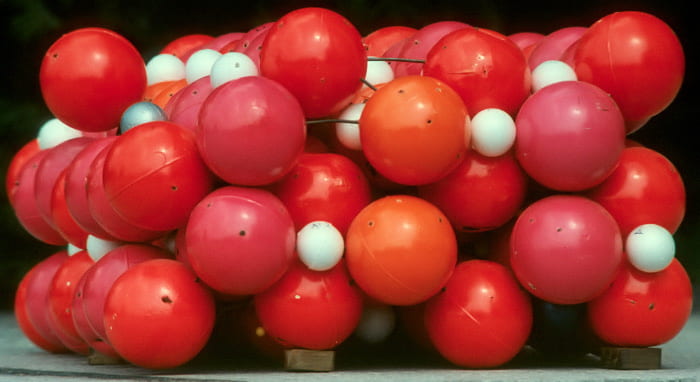
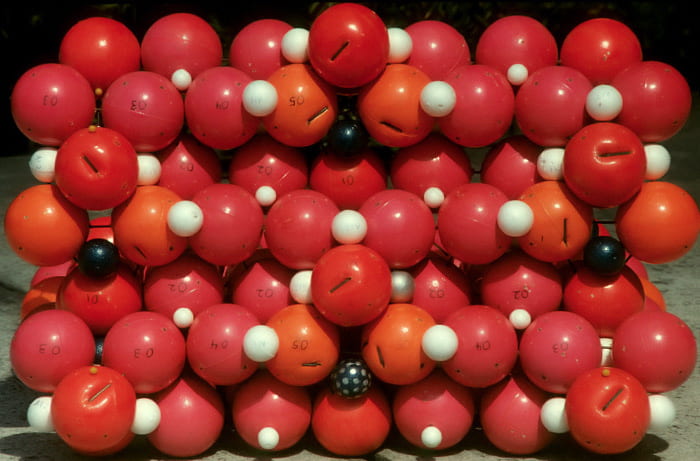
 Looking almost down the c axis, b is to the right, a is down. The {010} mirrors run vertically through the red O1 oxygens. The crystal structure can be thought as being composed of spinel-like slabs (parallel to the a–c plane) that include the red O1 and half of each orange O5. The intervening kyanite-like slabs include the magenta O2, O3, and O4 oxygens, and the other half of the orange O5 oxygens. The staurolite cleavage is parallel to the slabs and parallel to the {010} mirrors. Looking almost down the c axis, b is to the right, a is down. The {010} mirrors run vertically through the red O1 oxygens. The crystal structure can be thought as being composed of spinel-like slabs (parallel to the a–c plane) that include the red O1 and half of each orange O5. The intervening kyanite-like slabs include the magenta O2, O3, and O4 oxygens, and the other half of the orange O5 oxygens. The staurolite cleavage is parallel to the slabs and parallel to the {010} mirrors. |
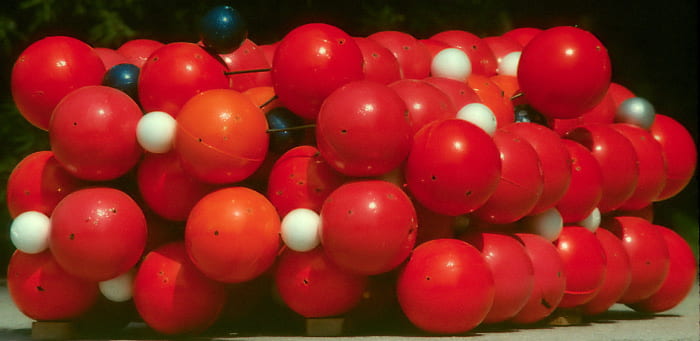
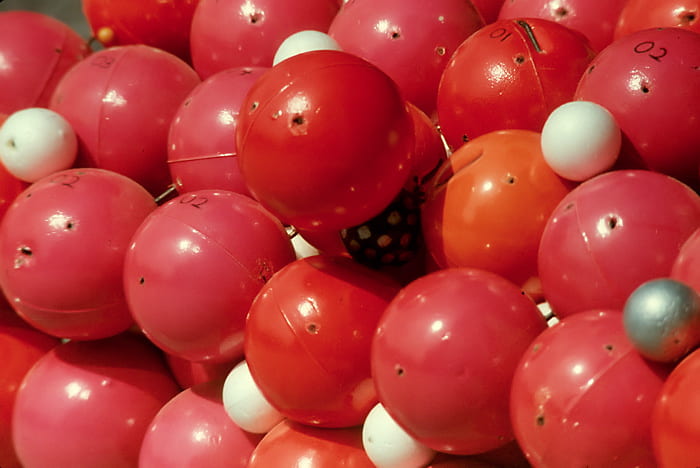
 Looking almost down the a axis, b is to the right, c is up. Spotted blue ball is in the large tetrahedral site that usually has Fe2+ but also likes Zn2+. Looking almost down the a axis, b is to the right, c is up. Spotted blue ball is in the large tetrahedral site that usually has Fe2+ but also likes Zn2+. |
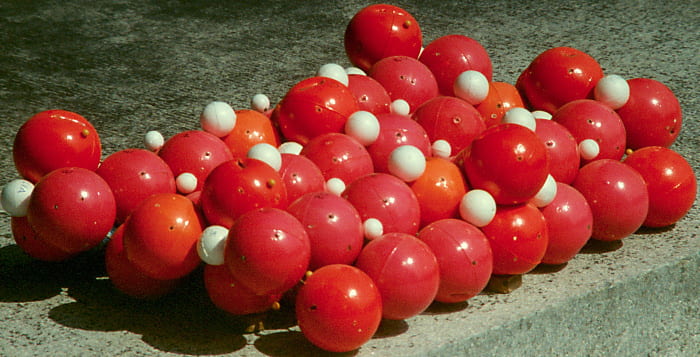
 Looking obliquely between a and b axes. The a axis is to the right, b to the left, c is up. Looking obliquely between a and b axes. The a axis is to the right, b to the left, c is up. |
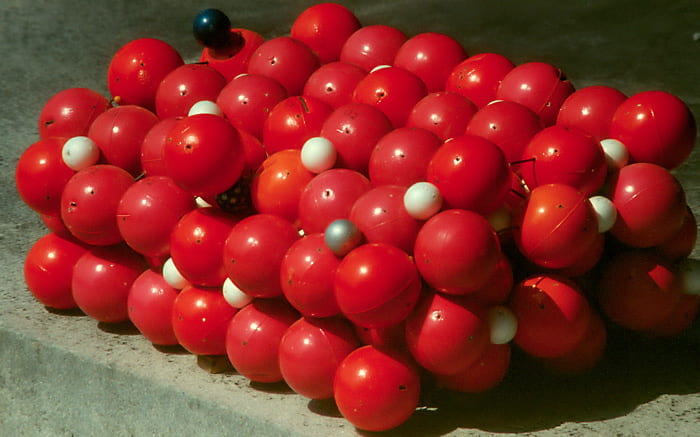 Looking obliquely between all three axes. The c axis is up, b to the right, a is to the left. Looking obliquely between all three axes. The c axis is up, b to the right, a is to the left. |
 Looking obliquely between all three axes. The c axis is up, b to the right, a is to the left. This image shows detail of the two OH– groups (O1). The H+ ions of these groups lie on the mirror. Looking obliquely between all three axes. The c axis is up, b to the right, a is to the left. This image shows detail of the two OH– groups (O1). The H+ ions of these groups lie on the mirror. |
 Looking obliquely between all three axes. The c axis is up, b to the right, a is to the left. This image shows detail of the large spinel-like tetrahedral site that lies on the {010} mirror. Looking obliquely between all three axes. The c axis is up, b to the right, a is to the left. This image shows detail of the large spinel-like tetrahedral site that lies on the {010} mirror. |
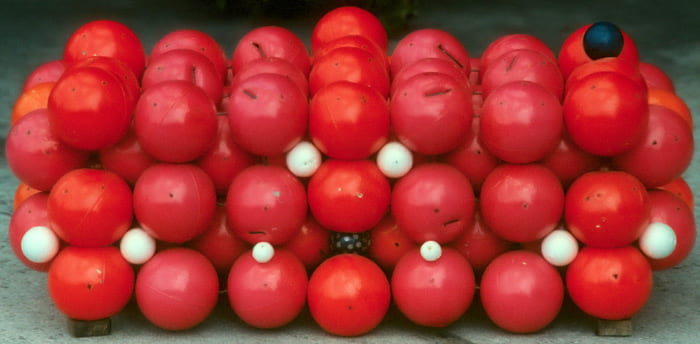
 Looking down the a axis, b is to the right and c is up. Notice that the two O1 oxygens are close together (short bond distance), as a result of Al3+ ions in adjacent edge-sharing octahedra. Looking down the a axis, b is to the right and c is up. Notice that the two O1 oxygens are close together (short bond distance), as a result of Al3+ ions in adjacent edge-sharing octahedra. |
 Looking obliquely between all three axes. The a axis is to the right, b to the left, and c to the right. The top of the model has been removed to show interior details. Looking obliquely between all three axes. The a axis is to the right, b to the left, and c to the right. The top of the model has been removed to show interior details. |
 Looking down the c axis, a is down and b is to the right. The top of the model has been removed to show interior details. The OH– groups are the red O1 oxygens, lying on the {010} mirrors. The large spinel-like tetrahedral sites, also on the mirrors, are surrounded by O1 and O5 oxygens. As described above, the staurolite crystal structure can be thought as being composed of spinel-like slabs (parallel to the a–c plane) that include the red O1 and half of each orange O5. The intervening kyanite-like slabs include the magenta O2, O3, and O4 oxygens, and the other half of the orange O5 oxygens. The staurolite cleavage is parallel to the slabs and parallel to the {010} mirrors. Looking down the c axis, a is down and b is to the right. The top of the model has been removed to show interior details. The OH– groups are the red O1 oxygens, lying on the {010} mirrors. The large spinel-like tetrahedral sites, also on the mirrors, are surrounded by O1 and O5 oxygens. As described above, the staurolite crystal structure can be thought as being composed of spinel-like slabs (parallel to the a–c plane) that include the red O1 and half of each orange O5. The intervening kyanite-like slabs include the magenta O2, O3, and O4 oxygens, and the other half of the orange O5 oxygens. The staurolite cleavage is parallel to the slabs and parallel to the {010} mirrors. |
