This stage system can heated up to 600°C, or cooled using cold gas. The sample can also be held in air, vacuum, or surrounded by a non-flammable, non-corrosive gas like nitrogen or argon. Note that we don’t have all the parts for all operational modes. Overpressures of up to 2 bars are OK, but the pressure relief valve operates at 3 bars. Here’s the instruction manual.
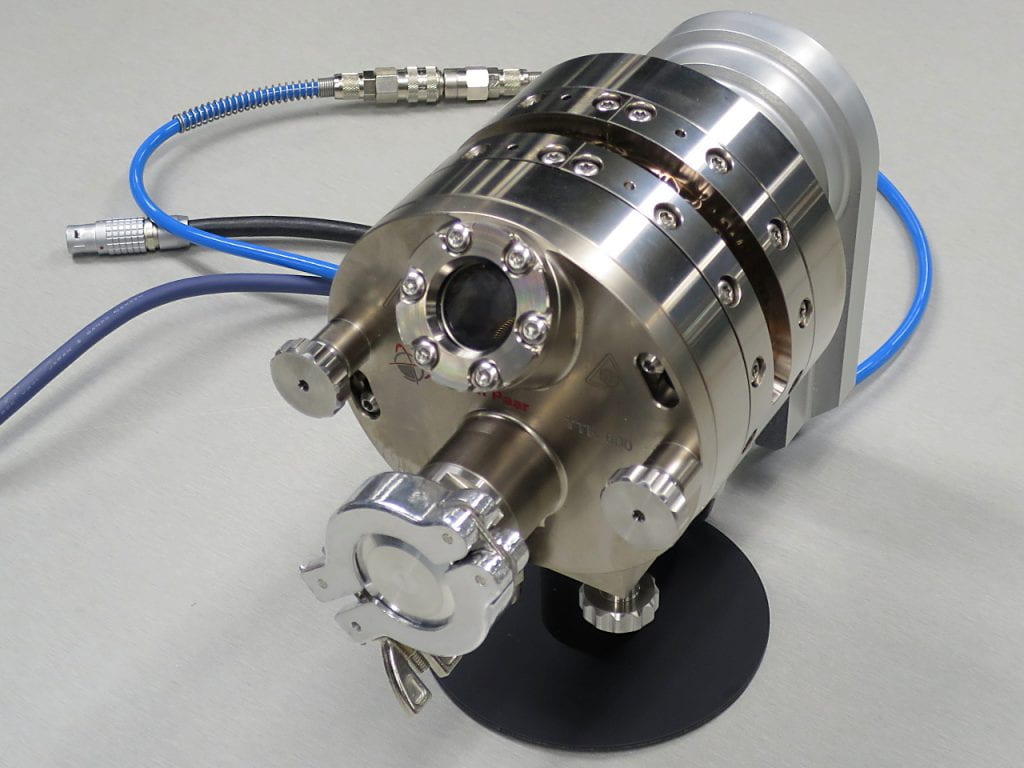
This is the Parr 600 oven, mounted on its black stand. Sample access is through the front: unscrew the two big finger bolts, twist the front cover, and pull the cover off. The front cover has a viewing window and a vacuum pump port. X-rays gain access to the sample through the brownish Kapton window around the cylindrical part, held in place with compression plates. The dovetail mount for the goniometer hub is in the back.
The Kapton windows are fragile, and should be covered with stiff paper, or something, while handling the oven.
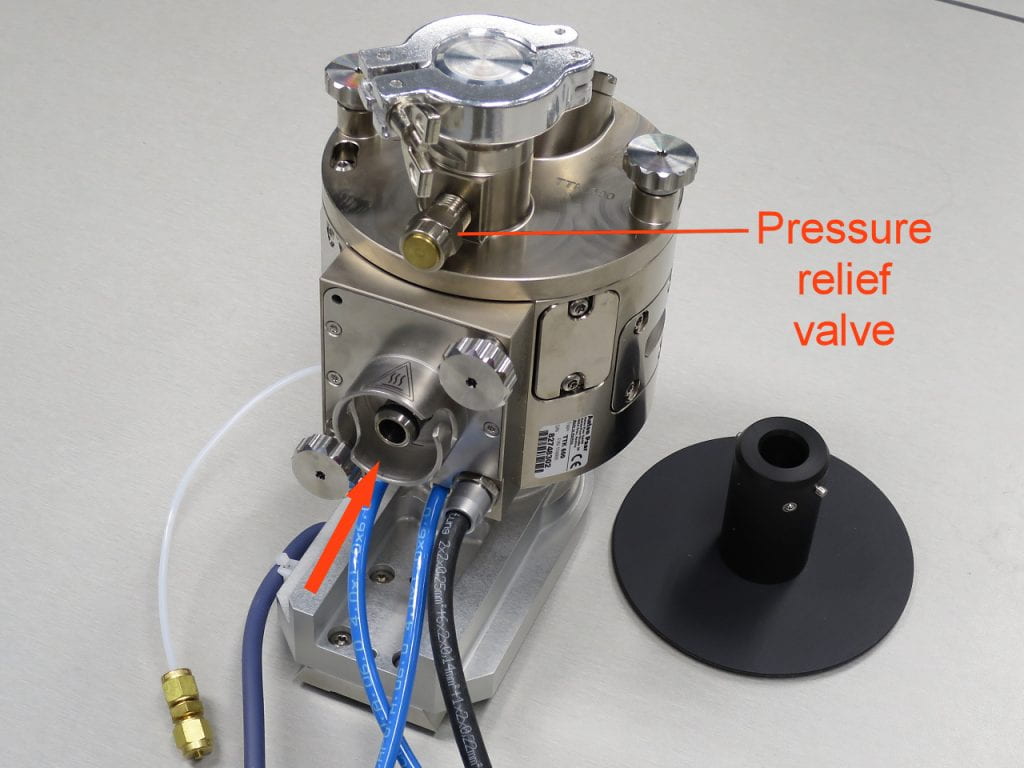
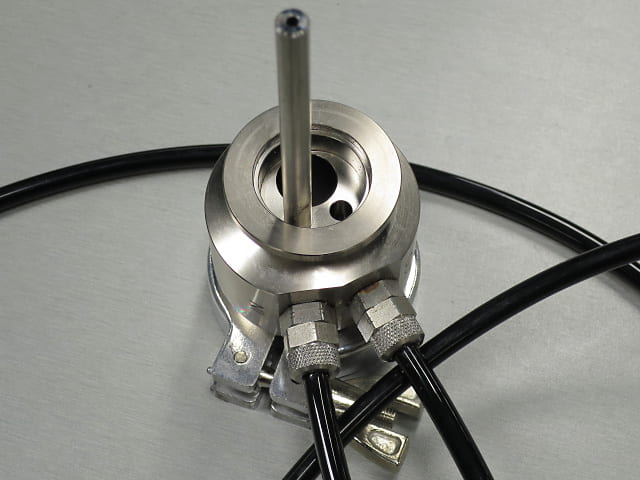
The stand is removed by twisting the black base and pulling it off the mounting ring (arrow). Here, the oven is resting on its dovetail. The two finger bolts on either side of the mounting ring can remove the oven bottom, which has the heater.
The pressure relief valve operates at about 3 bars. Basically, the oven should never be pressurized. Any gas that goes in should come out.
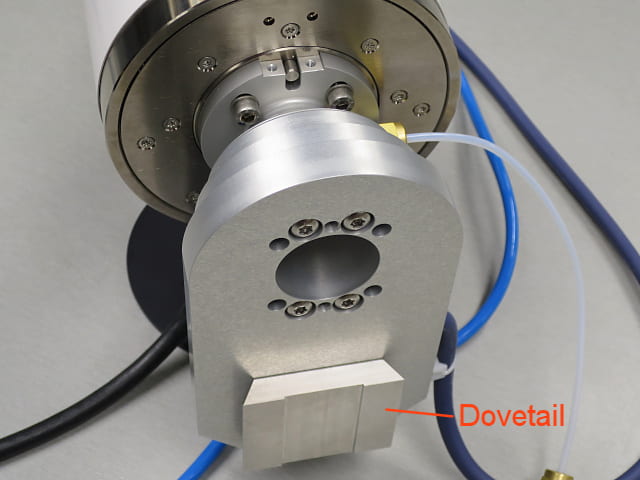
Here’s the dovetail on the back of the oven. It fits onto the goniometer hub the same way as the standard stage.
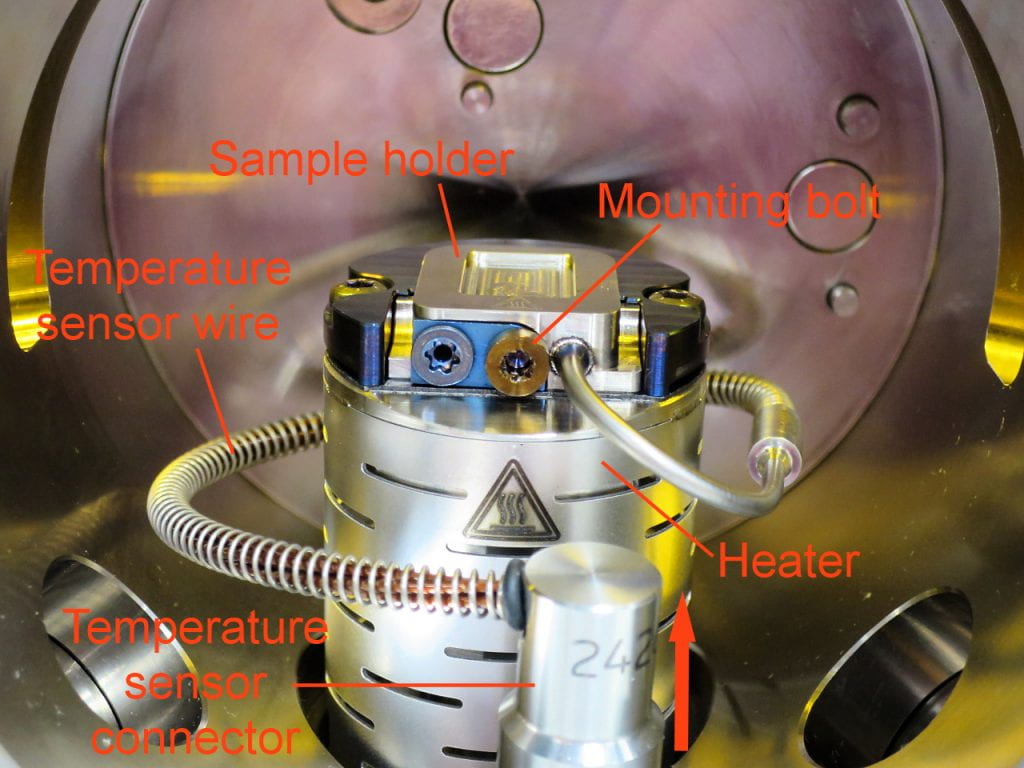
Looking inside the oven. The sample holder is a metal block with the sample well on top, and a built-in temperature sensor (it’s a platinum resistance sensor, whereas the heater itself has a separate thermocouple, so the manual says). To remove the sample holder for loading, pull up the temperature sensor connector, unscrew the mounting bolt, and pull the sample holder forward, to pull it out from under its alignment bracket.
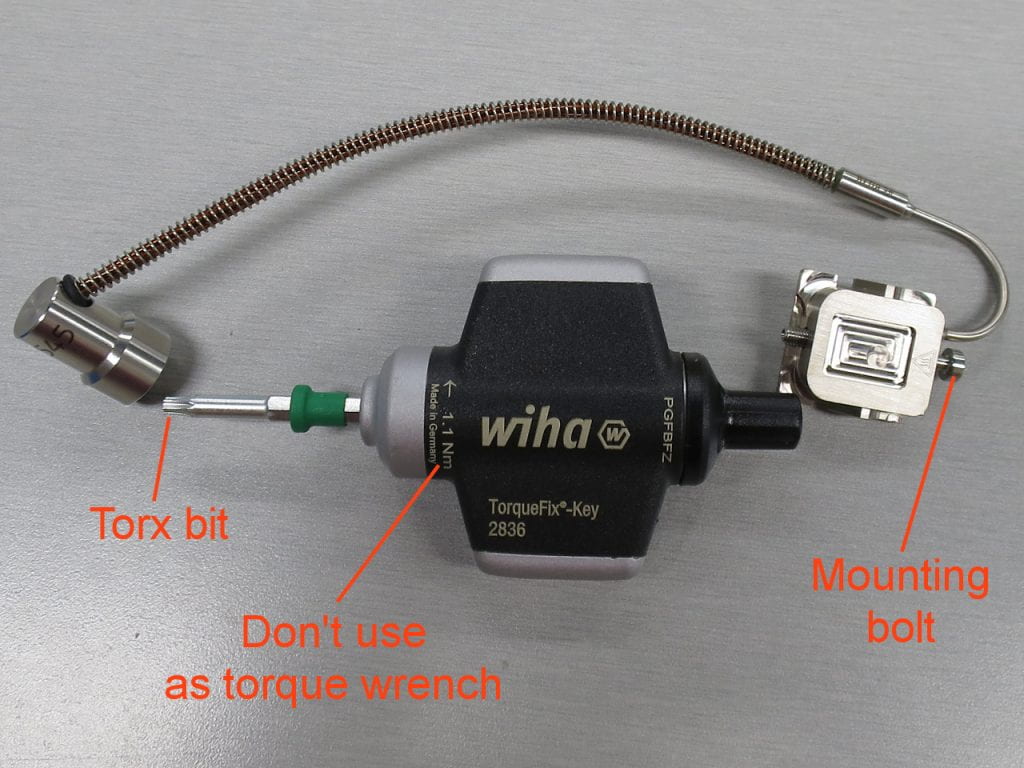
This is the machined nickel sample holder, with its attached temperature sensor wire, removed from the oven. We have two of these. Try not to bend the temperature sensor wire, it’s fragile. The mounting bolt can be removed with a the Torx driver, shown, stored in the accessory box. However, don’t over tighten the bolt! The Torx driver has a 1.1 Nm torque setting, which is far too much for the mounting bolt. Just tighten it as you would any other bolt of its size (enough, but not too much).
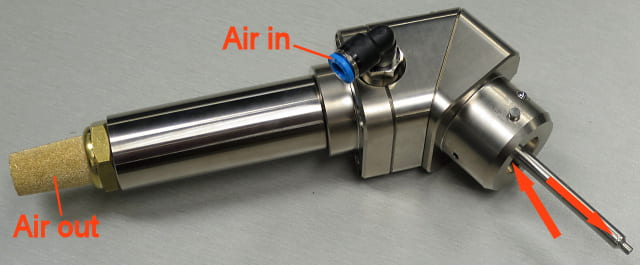
This oven needs water and air cooling. This is the air cooling adapter. Air comes in via a straight, black tube that plugs into the air-in port. Air flows up the thin pipe into the heater housing, and flows out through a hole near the base of the thin pipe. The air vents into the XRD housing through the sintered bronze filter.
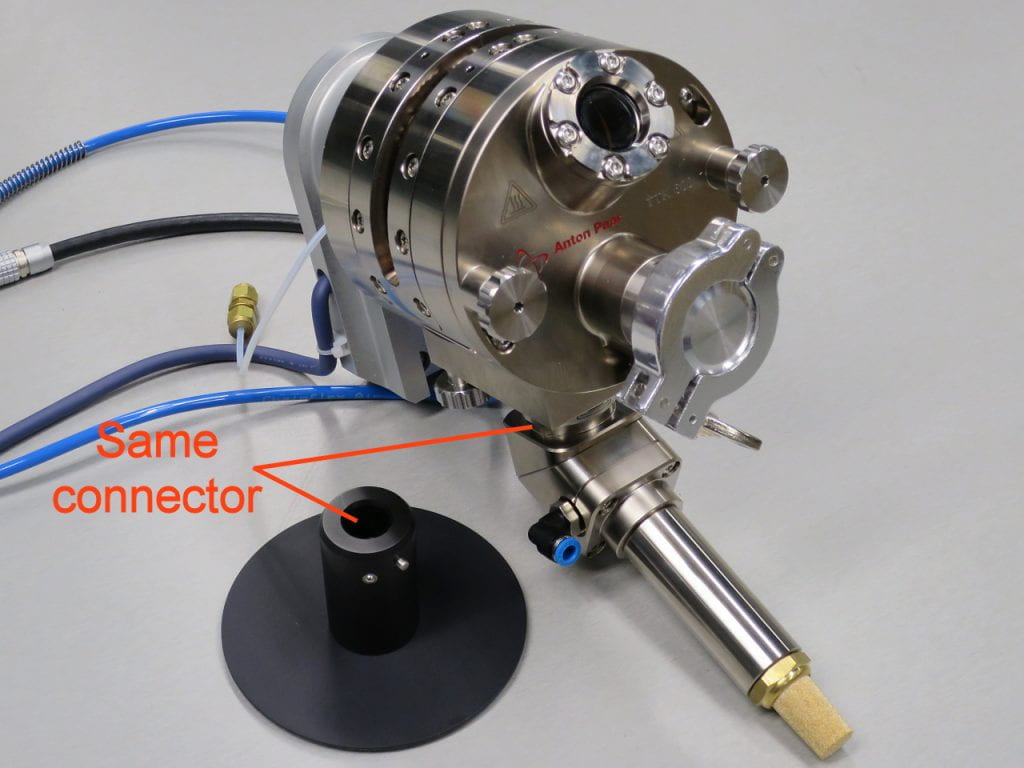
The air cooling adapter mounts to the same thing as the black stand. Push it in and twist to lock. Twist to unlock and pull it off.
This adapter can supply gas other than air to the sample. It fits onto the vacuum flange on the oven front plate. See the instruction book for its use.
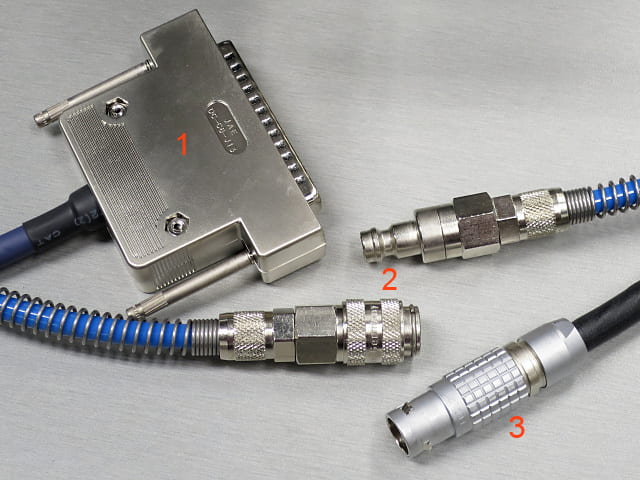
These are the connectors that are normally attached to the Parr 600 oven.
- Stage connector.
- Water cooling lines.
- Wire connector (temperature sensors, heater, over temperature protection).

Connections for the Parr 600 oven inside the XRD box.
- Water cooling lines.
- Wire connector (temperature sensors, heater, over temperature protection).
- Cooling air hose.
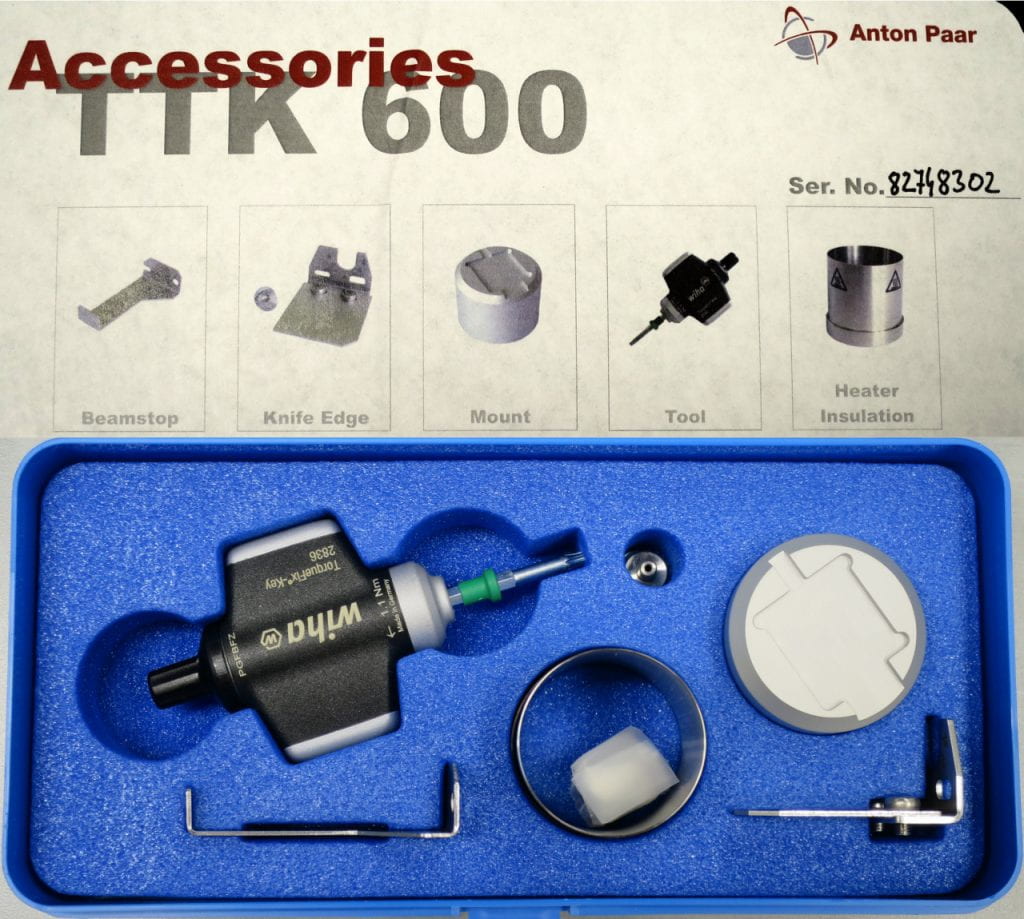
Accessories box. The beam stop is used for transmission work, to stop direct beam X-rays from damaging the detector. The knife edge reduces the amount of scattered background. The mount holds the sample holder at a convenient height to make it easier to work with, and to reduce cable bending. The “tool” is a torque wrench, for the sample holder bolt (warning: just use it as a regular driver, not as a torque wrench, the torque limit is too high for this little bolt). The heater insulation is supposed to be installed before installing the knife edge. See instructions.
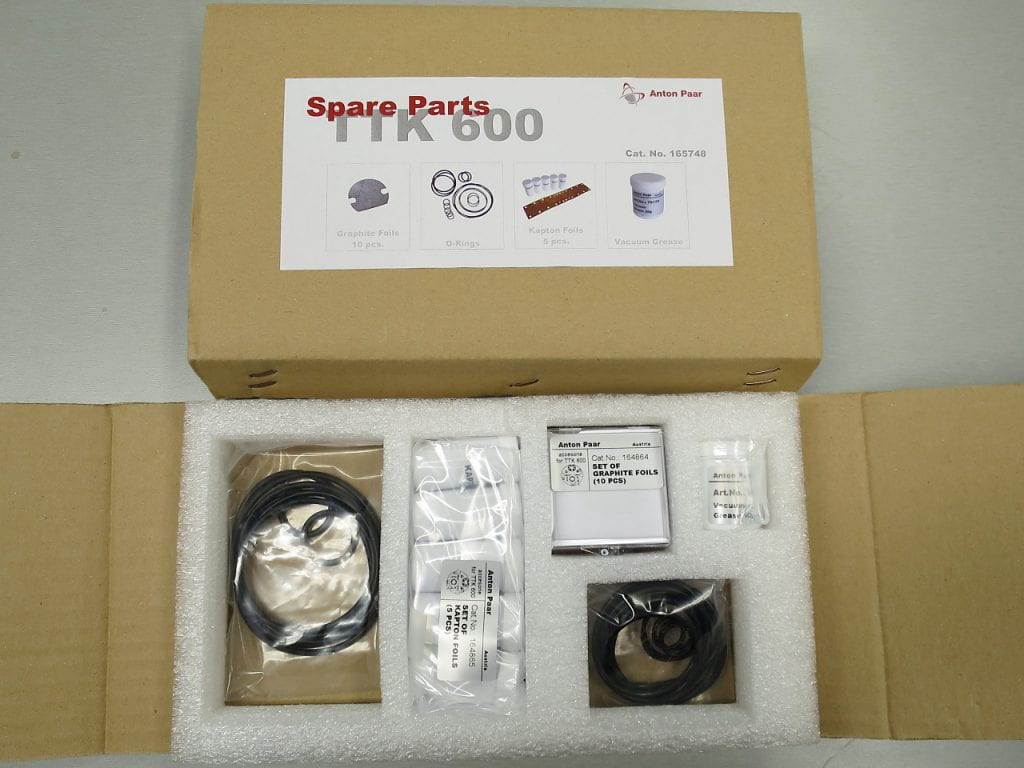
The cardboard accessories boxes contain Kapton foils, O-rings, and some other things. See instructions.
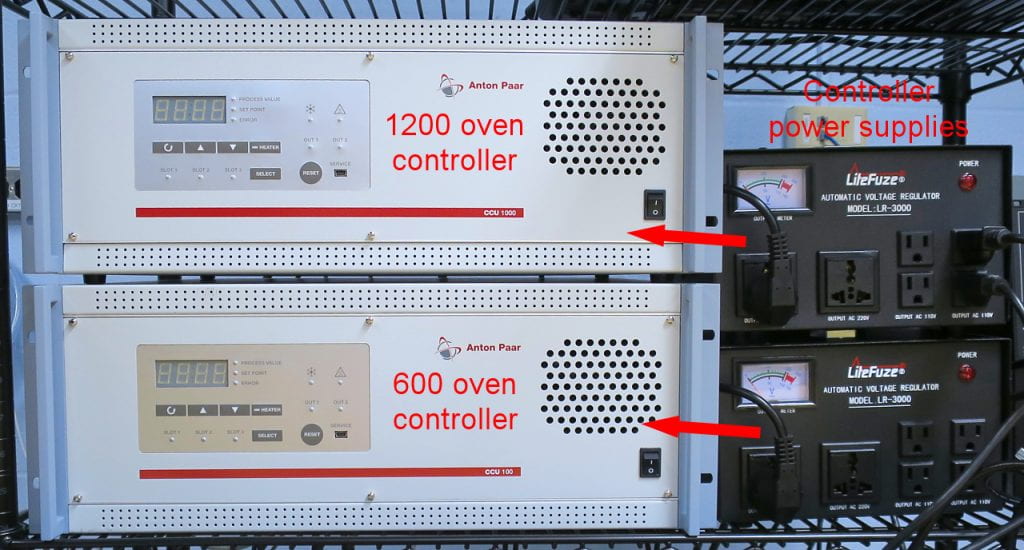
The bottom controller and power supply are for the Parr 600 oven (CCU-100). The power supply switch is on the back, whereas the controller switch is on the front. The two right-hand power cables on the right side of the top power supply go to the turbo pump power supply and controller. If you want to use the turbo pump with the Parr 600 oven, switch the two plugs to the bottom power supply.
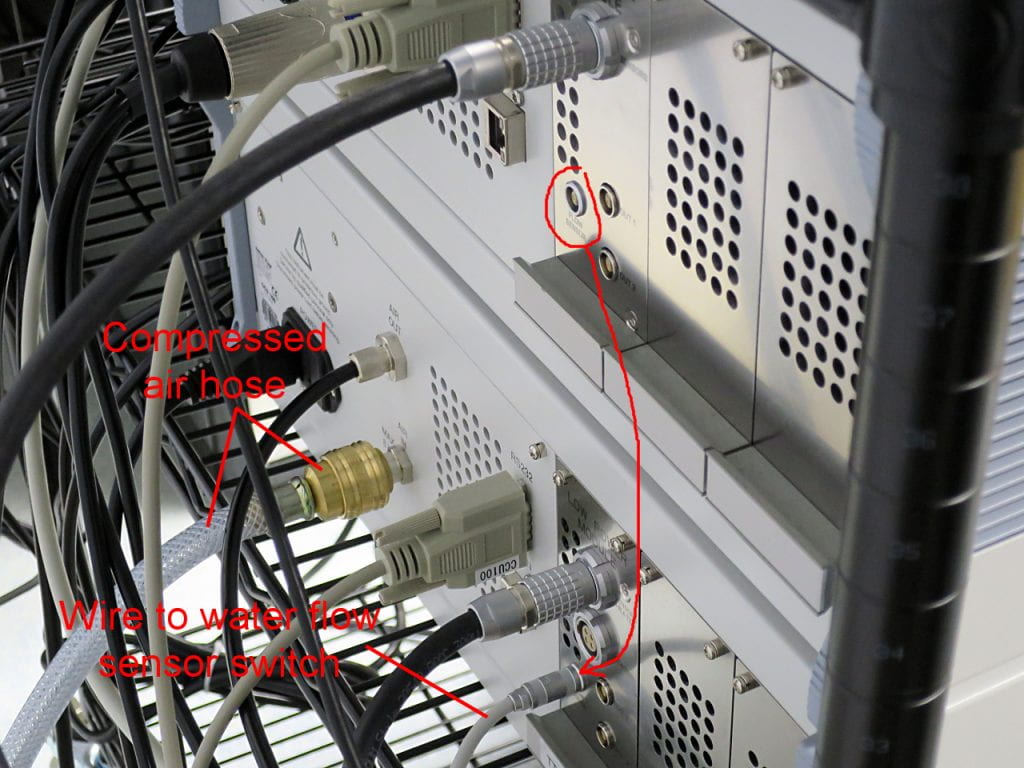
Both ovens have water cooling, and the controllers won’t turn the heaters on if water is not flowing. If you look at the plywood panel with the water valves, you will see the flow sensor switch. There is only one of them, so its wire has to be connected to the controller box for the oven you are using, in this case, the bottom controller box. Make sure the wire is plugged in to the correct port.
You can also see the cooling air hose for the Parr 600 oven. It goes in through the transparent, braid-reinforced hose, and comes out a thinner black hose to go to the oven.
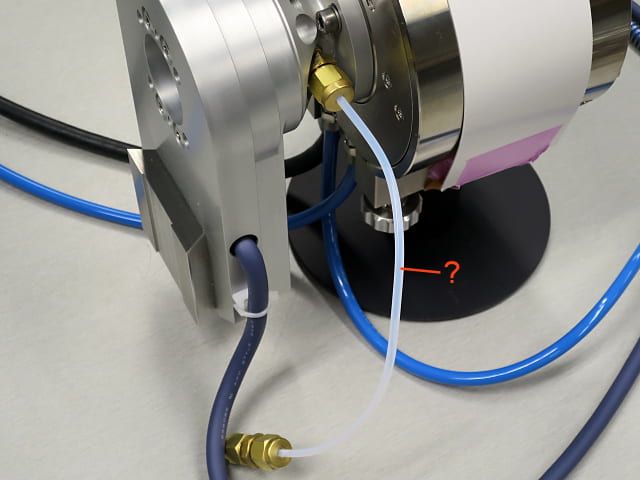
Sorry, I don’t know what this little tube is for.
