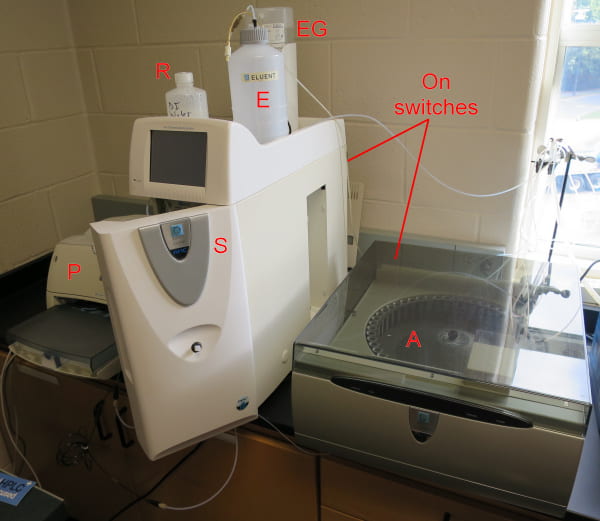
| A | Autosampler |
| S | System box |
| E | Eluant (holds deionized water) |
| EG | Eluant generator |
| R | DI water refill bottle |
| P | Printer |
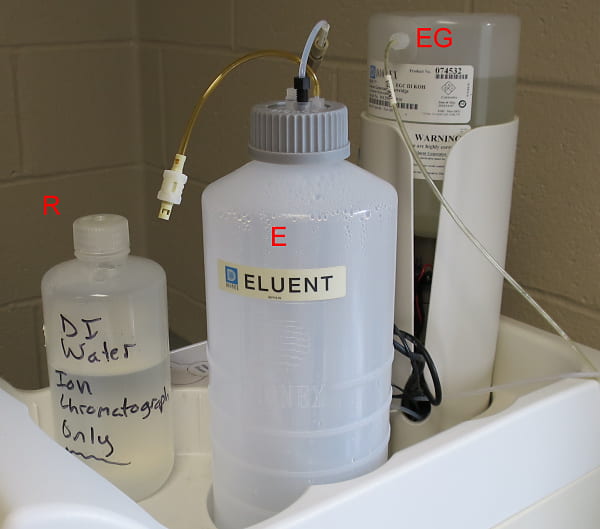
Fill the eluant bottle, E, with deionized water from one of the hood DI systems in 330.
Rather than disconnecting the big bottle, which is a pain, use the little bottle (R) to refill the big one.

Turn on the system switch.
If you are going to be running samples, also turn on the autosampler.
Both switches are in the back.
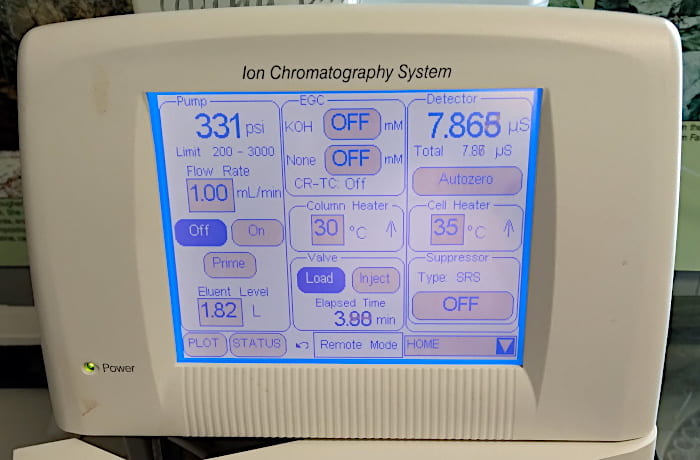
Wait until this screen is lit on the system box.
Next, turn on the anion chromatograph computer.

Double click on the Chromeleon icon to start the chromatograph software.
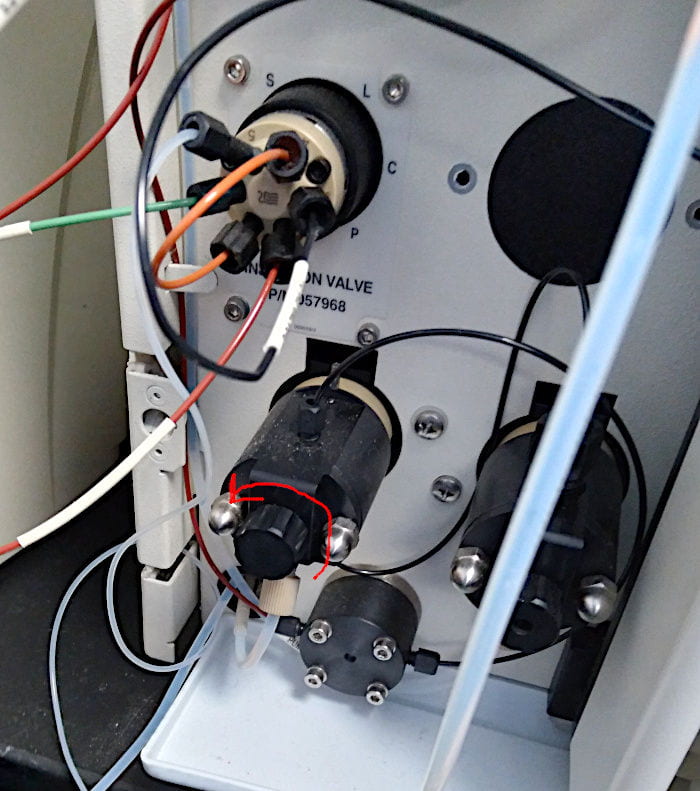
Open the pump purge valve a turn or two counterclockwise.

Press the Pump Settings button.
Press the Prime button in the new little window.
Press the OK button in the warning window.
The pump will start grinding away at high-speed (3 ml per minute).

Usually, bubbles will come down the Teflon eluent-in tube, that comes from the DI water bottle, seen above.
I don’t know how air gets into the system, but it always does. Watch the bubbles go down the tube, into the pump, and out the purge-drain tube at the bottom.
This usually takes less than a minute to flush the bubbles through the pump.
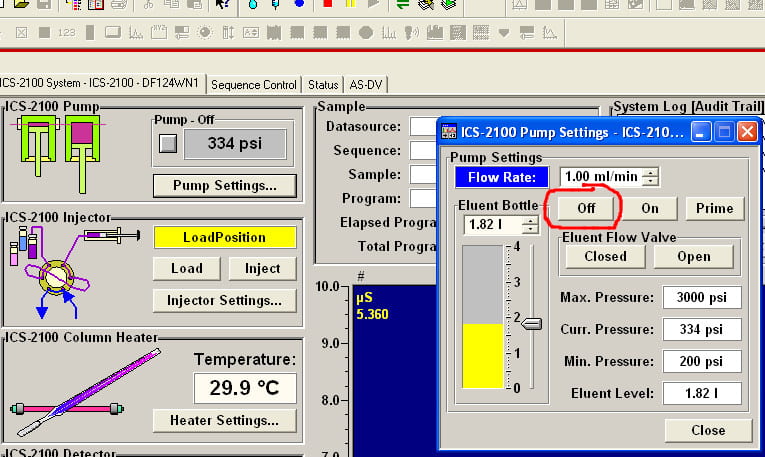
Turn the pump off.

Close the purge valve by turning clockwise. It only has to be somewhat tight. The threads are plastic, so don’t tighten too much. You can always tighten more later, if you notice the pump pressure is too low or unstable.

Press the Startup button. Most of the system will start correctly, however, there is a bug in the software that causes the suppressor current to revert to zero. Fix that in the next panel.
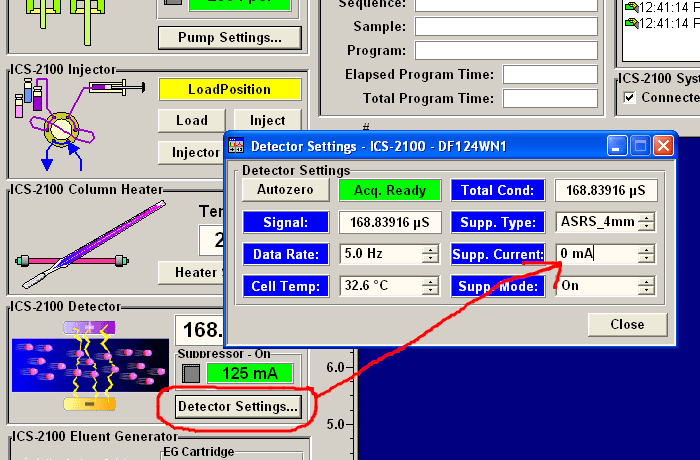
Press the Detector Settings button. The suppressor current will probably read zero. Change it to 125 mA.
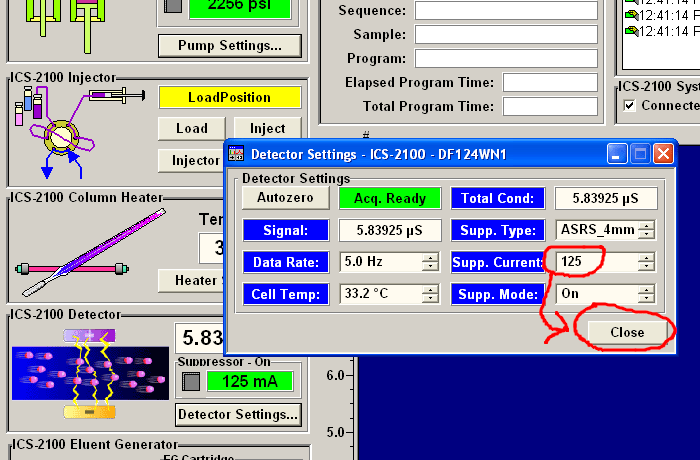
Change the suppressor current to 125 mA, and close the Detector Settings window.
The system should be running. Pump pressure usually rises to about 2500 psi at first, then decreases to about 2000 psi at equilibrium.

Click the blue dot in the menu bar, be sure ECD_1 is selected, and press the OK button.

The conductivity detector signal will be displayed.
In the first few minutes there may be some substantial peaks, which I think are ions that escaped from the suppressor ion exchange membranes (first peak) and ions leaking out of the eluant generator cartridge into the eluant stream (second peak). The peaks seem to get larger the longer the system has been off. Once those peaks are out of the way, the conductivity should gradually decrease.
If all you are doing is the weekly ion chromatograph run, to keep the suppressor membranes from drying out, you can shut the system down now.
You should usually let the system operate for a little while (10 or 15 minutes) before starting your run, to make sure everything is OK. Load your samples, monitor the eluant conductivity and pump pressure. Conductivity should eventually fall to a constant background of <1 or 2 μS. Pressure should eventually stabilize at around 2000 psi.
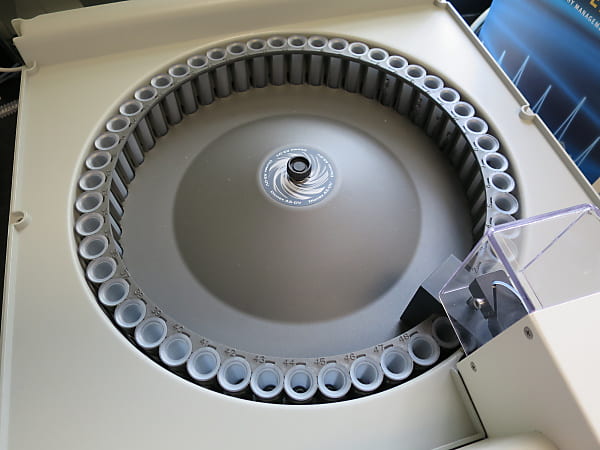
The anion autosampler has 50 sample places, 1-50. Put in the samples in the same sequence as in your schedule.
If you have more than 50 samples, they can be put in as the others are run. Just open the lid, pull out the ones that have been run, and put in the new ones to continue the sequence. It takes more than a day to run 50 samples, so just come back in the morning to do that.
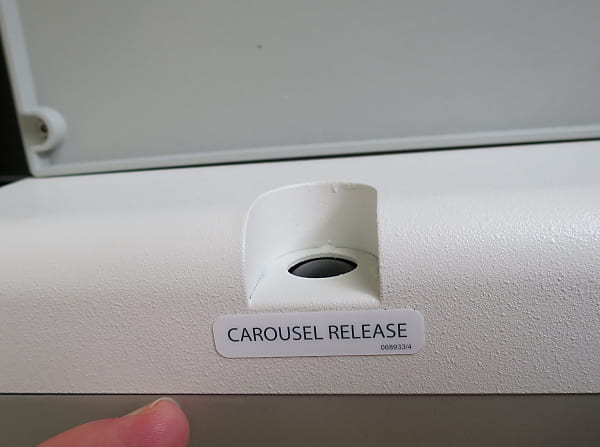
If the autosampler carosel is locked, covering some positions, push this black button to release it so it rotates freely.
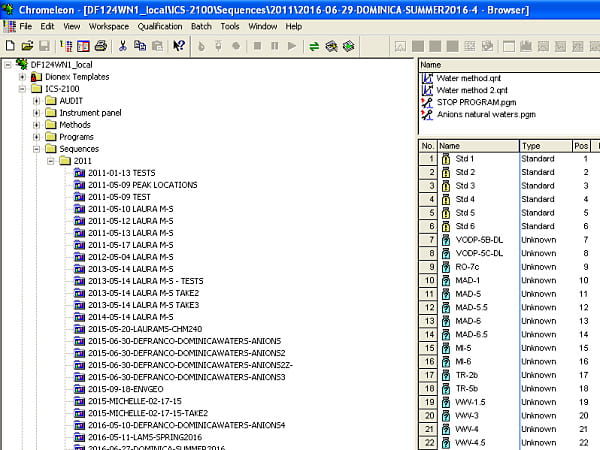
Set up the schedule. The schedule is a list of all of your samples, plus calibration standards, plus a few other things. The easiest way to start is to open the previous schedule that is similar to yours, and save it under your name. Then change the sample numbers and such, and save it again.
Schedules are usually saved with the name ‘Anions’ followed by today’s date (don’t use slash marks, use dashes).
First should be several test samples. They can be just about anything, like tap water. They are just to let the columns flush out and to make sure everything is working OK. Next should be the standards, generally in order of decreasing concentration. Immediately after the standards should be deionized water, just to make sure the standards are washed out. Next are your unknowns, which can be assigned dilution factors if they have been diluted (or you can do that afterward). Last are two samples to finish things up: one standard to make sure everything went OK, and also to correct for linear calibration drift, and lastly deionized water. The method for the deionized water should be ‘Stop Anions.met’. This method will turn off the pump and other electronics at the end of the run.
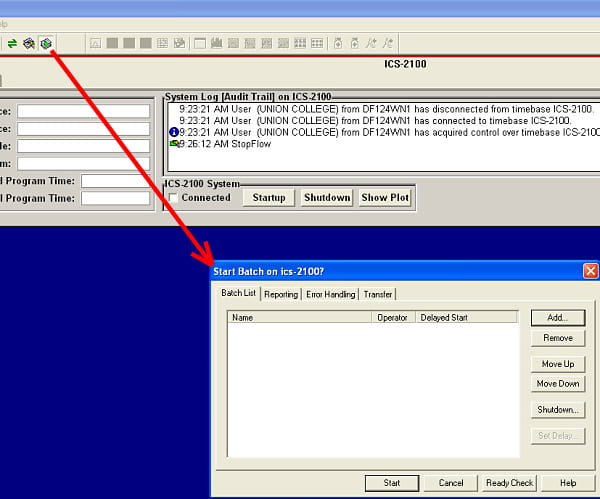
Open the Start Batch window and add your new schedule. Press the Ready Check button to see that your schedule is technically OK. Then press the Start button to start the run.
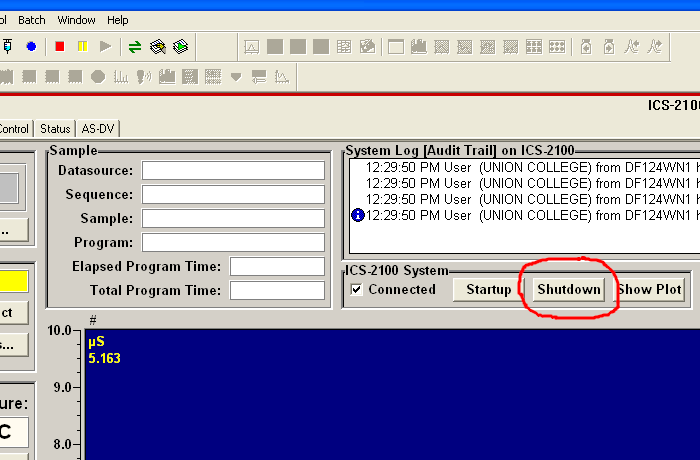
The run should turn off by itself, because of the last instruction in the schedule. Even if it doesn’t, follow the shut-down procedure here.
Empty the autosampler, so it will be ready for the next person.
You can now look through the data to check baselines, and extract it into a spreadsheet.
