Instrument Startup
Turn on the X-ray tube
Initial goniometer alignment
Instrument Startup
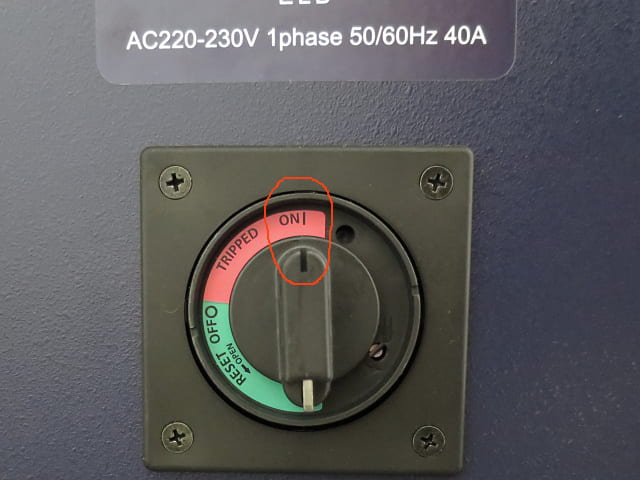
You rarely have to check this, but to be thorough, look on the back of the instrument. The circuit breaker looks like this. The black marker should be pointing up, to the ON position. If not, turn the knob to the RESET position, and then to ON.

Turn the chiller on. For more information about this, see here. If there is water all over the floor, as here, see about fixing that problem first.
Make SURE HyPix Server is Off! No flashing light on the small server sitting above the main computer.

Be sure the XRD doors are shut all the way. On the XRD front, turn the key from the ◯ (off) position all the way clockwise, then release. The key will spring back by itself to the | (on) position.

If all is well so far, the power light should be on.
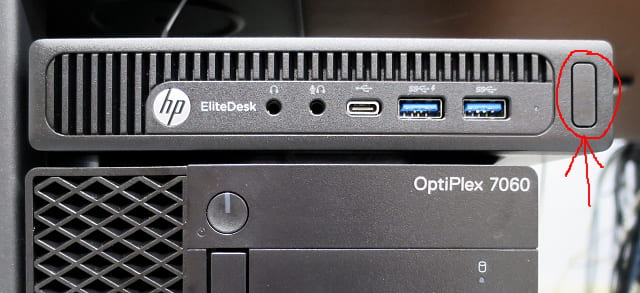
Turn on HyPix 400 server (EleteDesk): Hold button for ~2 seconds, this is the small server above main computer. This server is the interface between the HyPix 400 array detector and the big computer.

Turn on the big computer (OptiPlex 7060).
Password is rigaku.

After the big computer boots to the desktop, reboot it. Yes, it sounds crazy, but that’s the way it is. Click on the bottom-left blue icon, and press Restart. I know this image doesn’t look exactly like the desktop on the XRD computer, but I couldn’t get a screenshot of that one with the pop-up menu.
Password is rigaku.
Double-click the SmartLab Studio II icon. That will start the instrument control and analysis software. When prompted, enter the appropriate password. The program is not exactly speedy to start, so be patient.
If you are just interested in learning about system hardware or software, you can double-click the Smartlab SE Help icon.
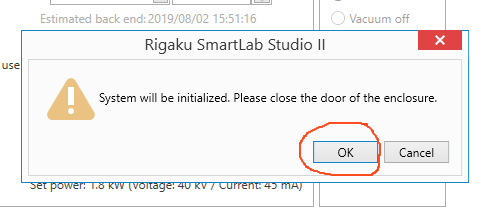
If all is still well, this message will show up (may take a minute or two). Be sure the doors are shut and press OK.
If this message does not show up, AND you want to collect new data, exit the software and reboot the big computer. That usually fixes it.
If you just want to play with old data, you can do that without the initialization.

NOTE: Once this message didn’t show up, yet I was still able to turn on the tube and run samples.
To see if the computer is communicating with the XRD, click on the H/W Status button. The status window will show numbers and actual names of devices if the communications are working. If so, turn on the X-ray tube. If not, re-boot the computer and try again.
Turn on the X-ray tube
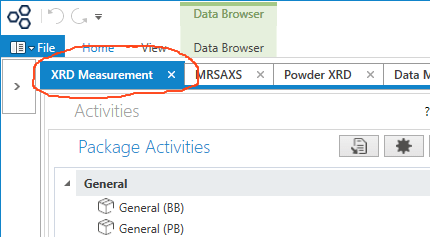
Be sure you are in the XRD Measurement tab.
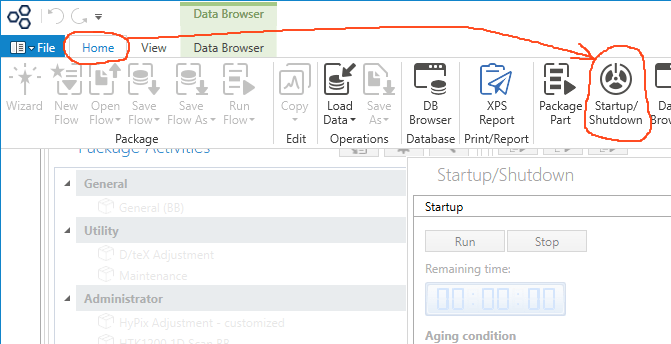
Press the Home menu, and click the Startup/Shutdown icon.

The Startup/Shutdown window should open. Be sure the Aging condition is set to Use aging table…. Press Run, and Yes.
If the Run button and other text is grayed-out, the initialization is still going on. It can take a minute or two. Run and other text will turn black when it’s ready.
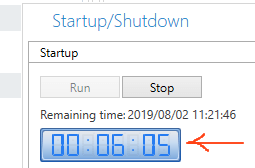
The tube power will ramp-up. You can’t do anything till the clock reaches zero, so prepare your samples, or something.

When the tube is powered-up, close the Startup/Shutdown window.

As soon as the tube starts to power-up, the X-rays on light should turn on. Can’t open the doors? It’s dark inside the XRD cabinet? See here.
Initial goniometer alignment
Every time the instrument is turned on, an initial alignment should be done. This example uses the General Bragg-Brentano measurement method, but other methods are similar.
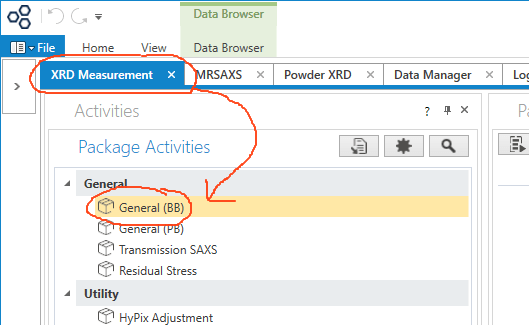
Go to the XRD measurement tab, and in the Package Activities window click on the General (BB) method.
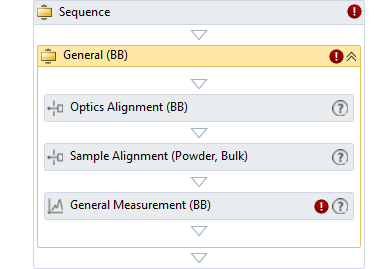
The method sequence window opens. Notice how four items are nested within Sequence, what this window shows, and three are nested within General (BB), the name of this sequence. The three items nested within General (BB) are the activities that can be run in this method.
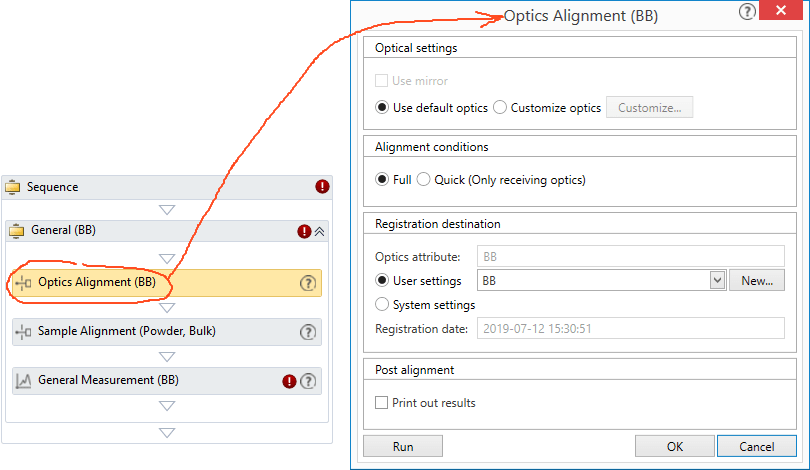
Click Optics Alignment (BB) sequence item to open the Optics Alignment (BB) window. For more detailed descriptions, but using a different detector, see this from the Help system.

In the Optics Alignment window, make sure the options are all as shown, especially the use of Systems settings, and press the Run button. You will have to wait a bit while the software queries the hardware for its current configuration. Sometimes you have to press the Run button twice.

A Smart Message window opens, showing the hardware you need to check or to change inside the XRD. Blue means check that the thing is there or put the thing in, red means take the thing out. This is telling you three things:
1. Check to make sure the standard sample stage is installed (most of the time it is).
2. Install the center slit alignment tool.
3. Remove the Kβ filter.
The software shows pictures of the things you have to check or handle, and approximately where they are taken from or put in. When you think everything is right, press OK.
If you changed the configuration correctly, the alignment procedure will start. You can watch its progress in the Optics Alignment (BB) running window.
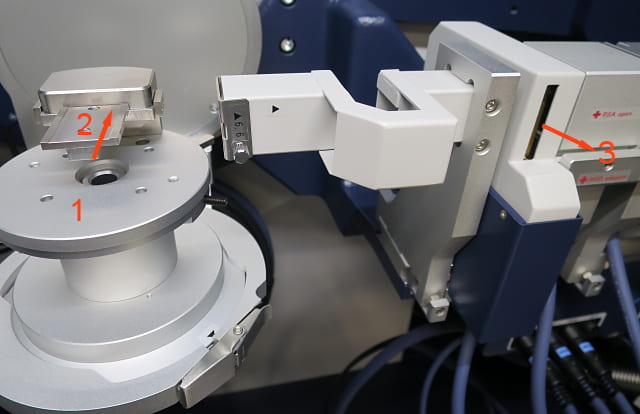
In this case, here are the things described immediately above: 1 is the standard stage, 2 is the center slit alignment tool, in place, and 3 is the Kβ filter removed.
The center slit tool is usually in an open box inside the XRD housing. You can put the Kβ filter in the same box. Don’t touch the filter foil itself, it’s fragile and expensive.

The Hardware Control window opens, which shows progress of the alignment procedure. It takes a few minutes. When complete, it brings you back to the Optics Alignment (BB) window.
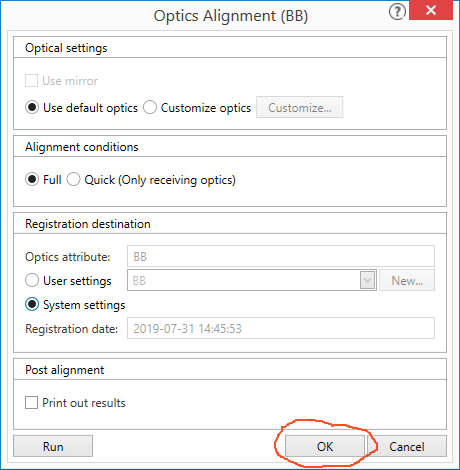
Now that you’ve returned to the Optics Alignment (BB) window, press OK to exit.
The initial alignment is complete. Go back to the main menu and do the next thing, which is probably running a sample.
