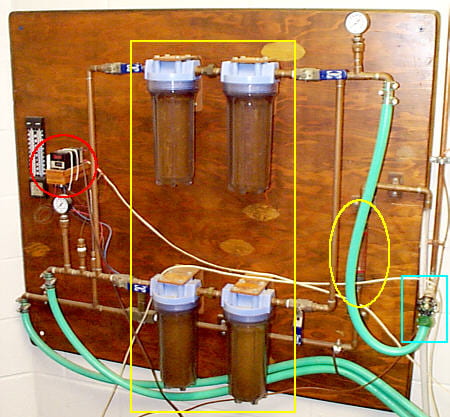
The filter panel is where you start. It supplies clean cooling water to the high-voltage power supply and X-ray tube. This panel has a main valve (blue box), filters ( yellow box ), a flow gauge ( yellow oval ), and a temperature safety switch (red circle).
1) Open the main valve ALL THE WAY (blue box). If you don’t, you may have pressure drops that turn off the XRD during your run.
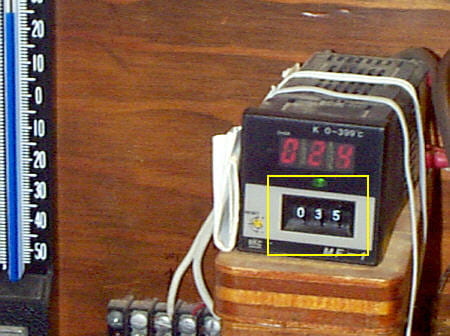
2) The temperature safety switch thumbwheel numbers ( yellow box ) should be set to 35°C. The red LED numbers are the actual temperature at a thermocouple in the water outflow stream.
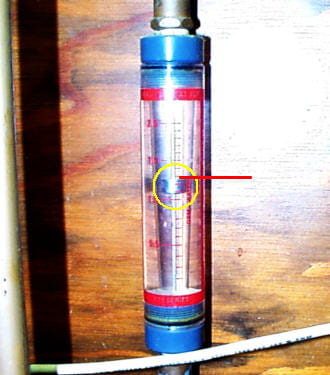
3) Check to make sure that water is flowing at a rate of at least 1 gallon/minute by reading the bottom of the float ( yellow circle ) in the flow gauge. If the water flow is too low, the generator won’t start.

4) Be sure the circuit breaker is on. The thick copper wire is to equalize ground potential between the XRD and the computer. Because the computer and XRD are on different circuits, it’s possible for the potentials to be different by up to a few volts. That can cause communication problems between the XRD and the computer.
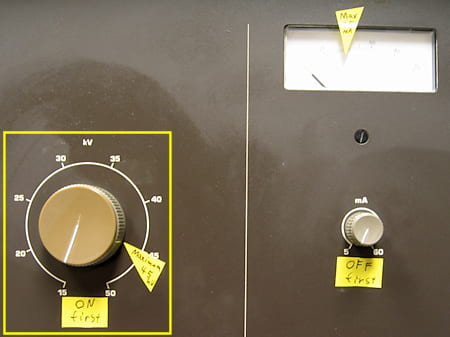
5) Make sure that the kV knob (left, yellow box ) is turned off all the way counterclockwise.
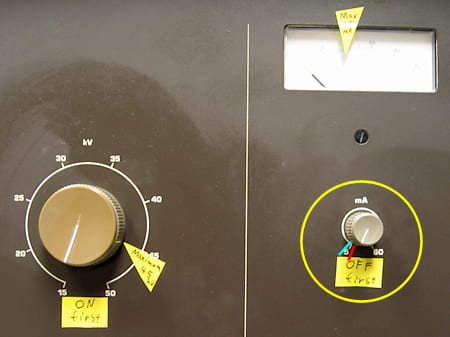
6) The generator will not start with the mA knob (right, yellow circle) turned fully counterclockwise (red line). Turn the mA knob slightly clockwise (hear a click) to allow the generator to start (blue line).
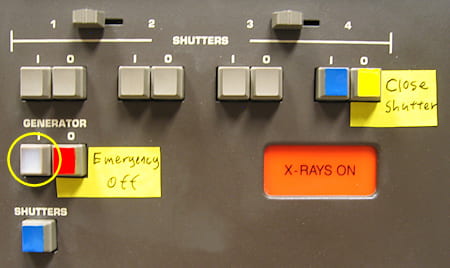
7) Press the GENERATOR on button (Yellow circle). This should start the generator and the goniometer control box. The goniometer should automatically drive itself to 12° 2Θ.

8) Raise the VOLTAGE FIRST to 20 kV ( yellow circle ).
Then raise the current (knob to the right) to 10 mA.
Then, slowly raise the voltage in 5 kV steps, waiting 1 minute per step, to 45 kV. This slow increase is only necessary if the diffractometer has been off for days. If it has been in relatively constant use, you can probably turn the voltage up more quickly. If an instability develops in the current meter (upper right white box), immediately turn down the voltage and current and then start raising it much more slowly.
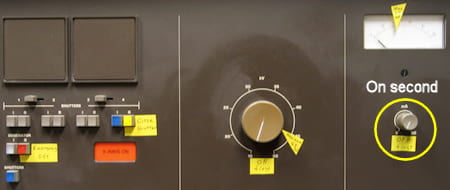
9) Slowly raise the current ( yellow circle ) from 10 mA to 40 mA. If the current meter starts to wiggle back and forth, immediately turn down the current and try again much more slowly. Current instability is caused by arcing in the X-ray tube, due to accumulation of gas. Never let the power to the tube exceed 1800 W. In general, the power settings should be 45 kV and 40 mA (1800 W).
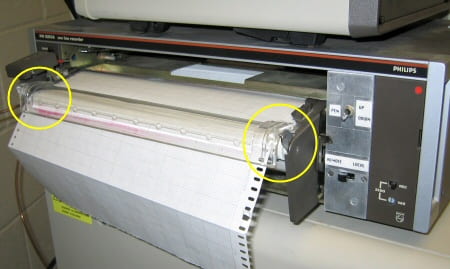
10) If paper is not in the chart recorder, put paper in. You won’t actually use the chart recorder, but the controller needs to have the chart recorder operational or it won’t let the scan start. Make sure the paper is disengaged from the paper feed pins ( yellow circles ).

11) Raise the right side of the plastic retaining bar (red arrow).
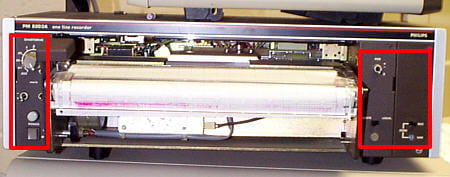
13) Set the recorder controls (red rectangles):
POWER ON, CHART DRIVE set to 10 mm/° 2Θ, REMOTE/LOCAL set to REMOTE, RECORD/ZERO set to RECORD, Other switches are inactive with the these settings.
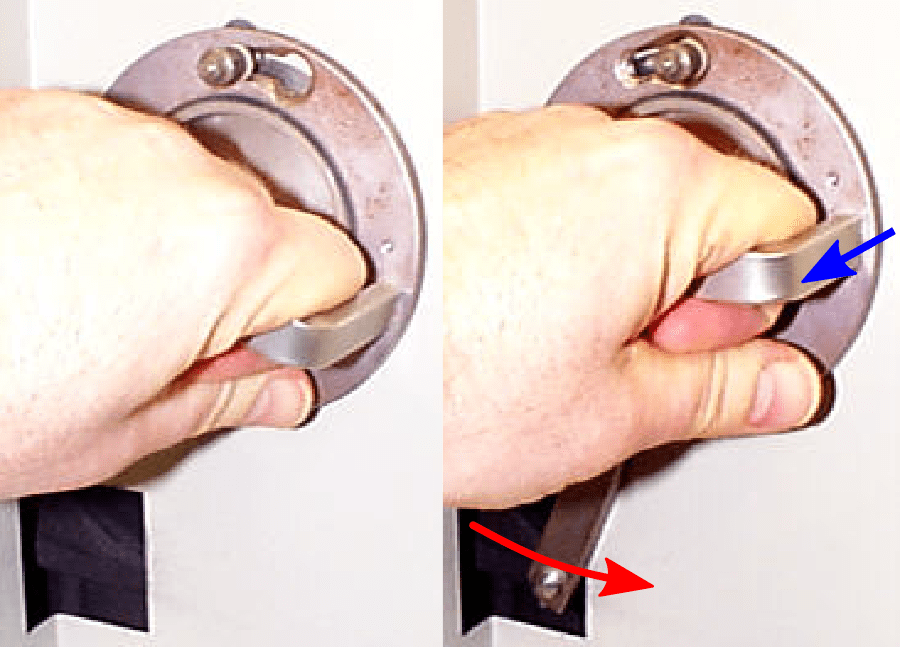
14) Remove the radiation shield by turning counterclockwise (red arrow), and pulling out (blue arrow).
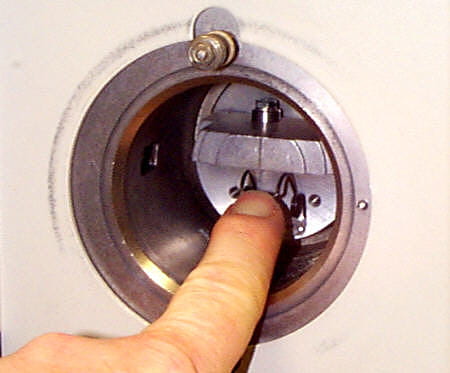
15) Push down the sample holder spring with your fingernail.

16) Slide the sample into the goniometer, pressing it against the back wall of the chamber and centering it left to right.
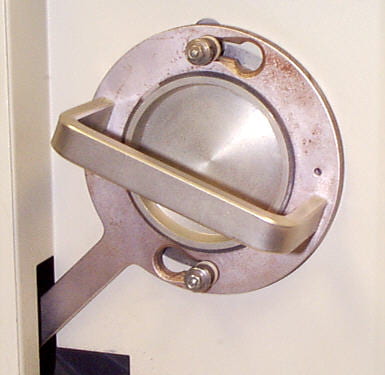
17) Replace the shield and lock it in place.
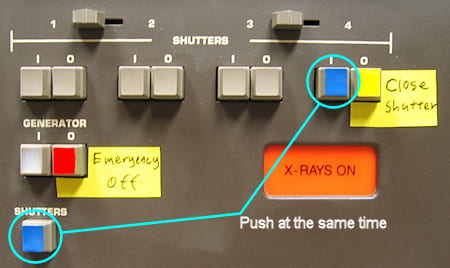
18) Press both blue SHUTTER buttons at the same time. This opens the shutter, illuminating the sample with X-rays.
If the orange SHUTTER OPEN light doesn’t turn on, check that the goniometer shield is locked in place, and that you are pushing the right buttons. Be careful NOT to push the GENERATOR OFF button (red). Also make sure that the slider switches, at the top of this image, are both to the left.
You are almost certainly running this scan by computer. Start the Datascan program from the computer desktop and follow these instructions. If you are running the scan manually and with chart paper output, see your psychiatrist, and also the controller and chart recorder instructions.
