Before any ICP-MS run, you should first check the hardware (cones, spray chamber, rinse acid, vacuum pump enclosure temperature, and such).
Much of the ICP-MS software is designed around running aqueous solutions. The default startup routine includes a nebulizer, torch, lens, and quadrupole tuning sequence that uses the normal tuning solution, containing 1 ppb each of Li, Mg, Co, Y, Ce, and Tl. It turns out that tuning on solutions also gives best results for laser ablation, except for some sample introduction and torch depth settings.
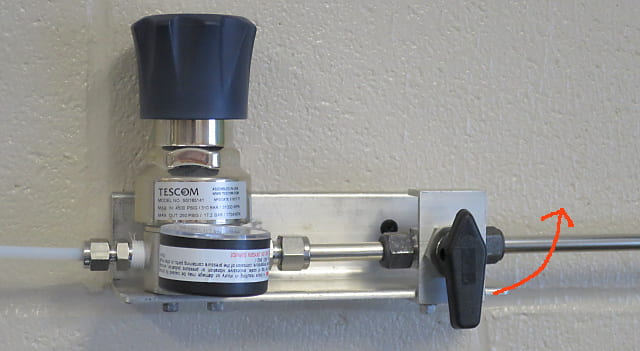
Open the argon valve, which is behind and to the right of the ICP-MS.
Actually, this valve should usually be open, to keep the system purged of air.
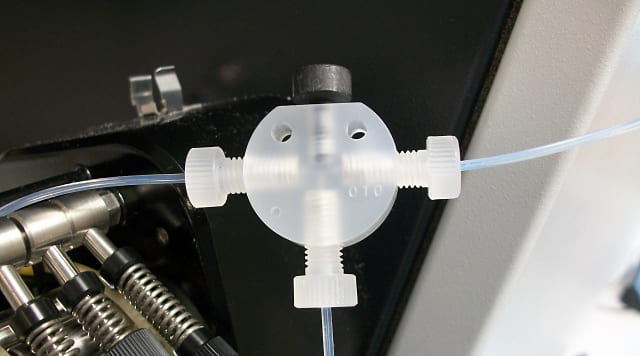
Check the sample-internal standard mixing T, and make sure it is set up as you need it.
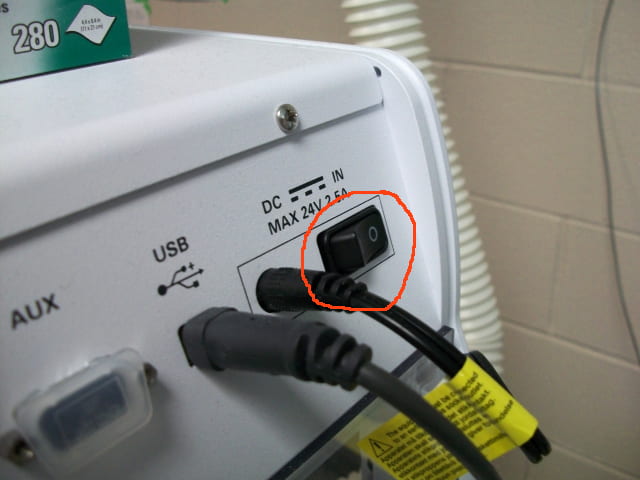
Turn on the autosampler. It goes through a check routine, with the sampling probe zipping around. Keep your hands out!

Put in the bottles you need, in the places the software thinks they should be. Typically, 1% nitric acid or other wash acid is in #1 and the tuning solution is in #5. If you are doing a dual detector calibration during startup or when you start your batch, put that in #3. #2 can be used for a different wash acid, and #4 might be for deionized water. #1 and #5 are the only ones almost always used for solution work.
The autosampler probe is always put in a solution before the plasma is started (acid or DI water, not the tuning solution). Don’t be tempted to put the probe in tap water or dissolved rock during the 20-minute warm-up time, for example to condition newly cleaned cones. There is no cleaning step before the probe moves to the tuning solution, so it would get contaminated. Don’t forget to take the caps off!
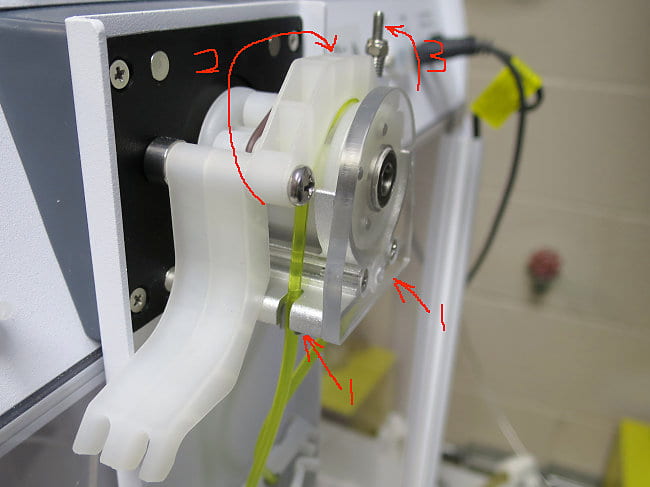
Wash well pump line, yellow Solva tubing, gray-gray tags: Hook on the plastic tags, swing over the clamp, swing in the clamp bolt. Only one tube is usually used.
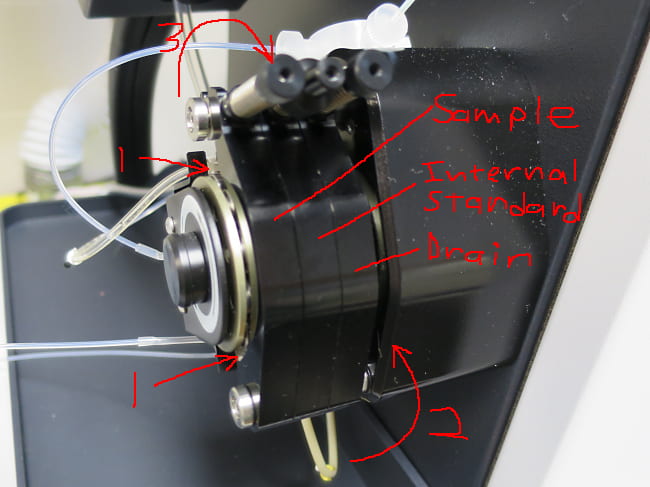
Hook the tubing plastic tags over their respective hooks, swing up the clamps, swing in the clamp bolts.
Sample tube is PVC, white-white.
Internal standard tube is PVC, orange-blue. If you aren’t using an internal standard, see here.
Drain tube is beige Pharmed tubing, yellow-blue. Here is a list of peri pump tube color codes.
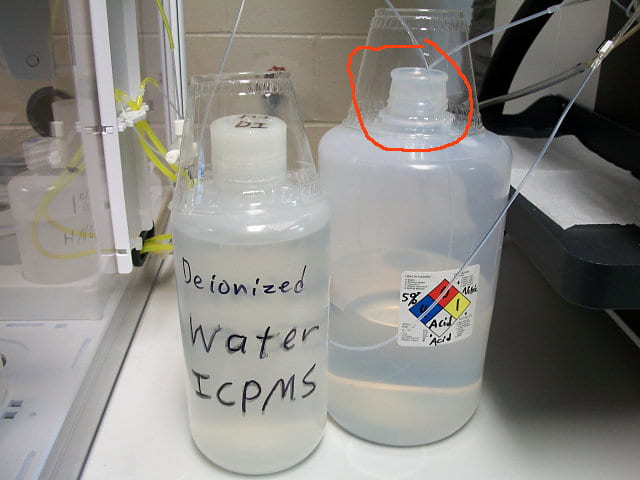
During startup, put both the wash acid tube and internal standard tube into the 5% wash acid bottle.
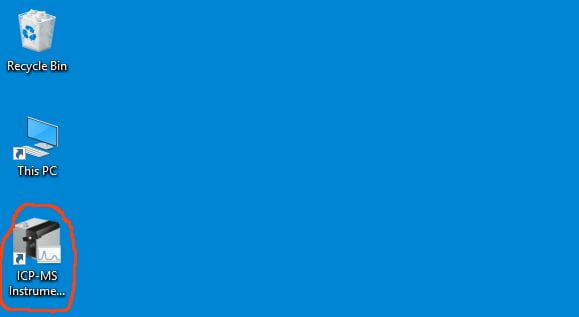
Start the computer, and the instrument control software.
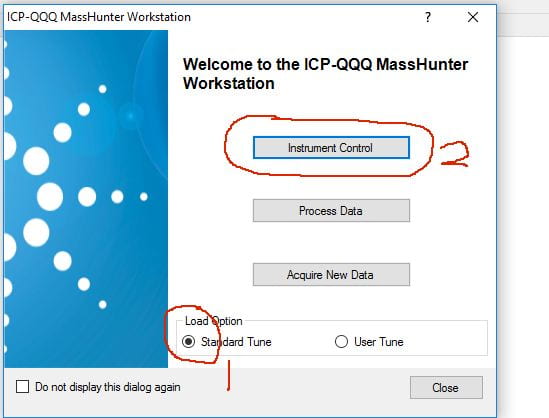
In the welcome window, be sure Standard Tune is selected, then press Instrument Control.
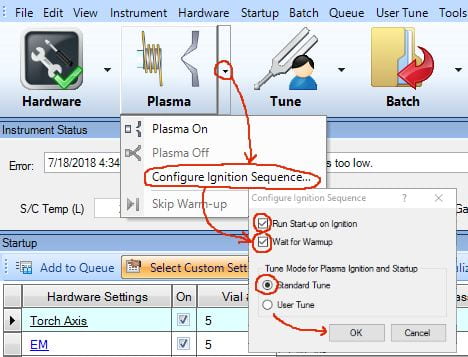
Go to the Configure Ignition Sequence menu.
Be sure the different items are selected, as shown.

Push the Hardware button, click on the spray chamber icon. Select Properties, and make sure settings are as shown.
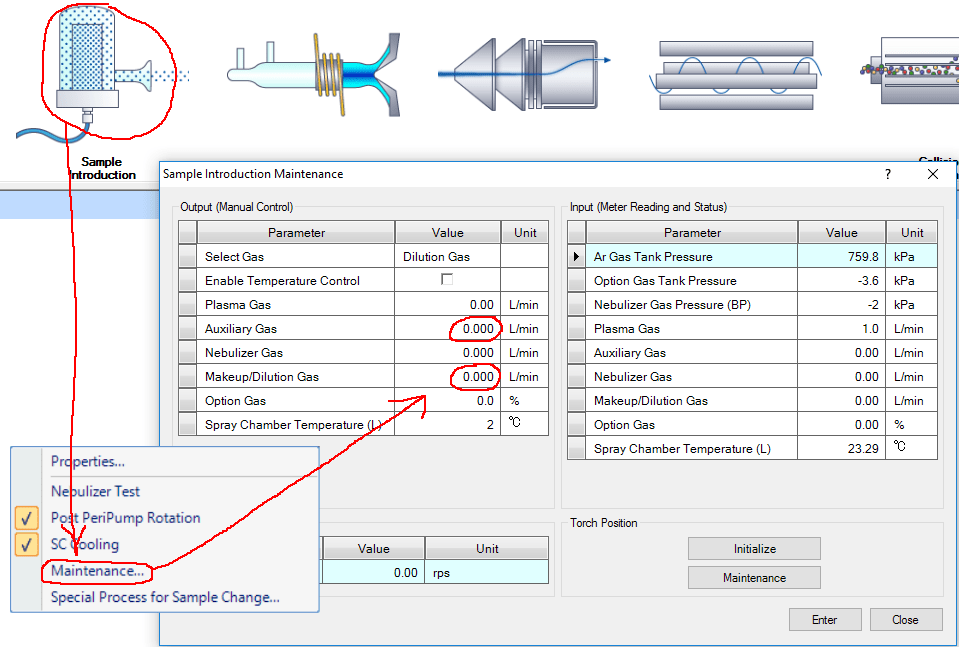
Push the Hardware button, click on the spray chamber icon. Select Maintenance, and make sure the highlighted gas flows are set to zero.

Send the autosampler probe to one of the rinse ports. This turns on the rinse pump, which pumps acid into the rinse wells. When the rinse wells are full, exit the autosampler window. The rinse pump only runs when the autosampler probe is in a rinse well.
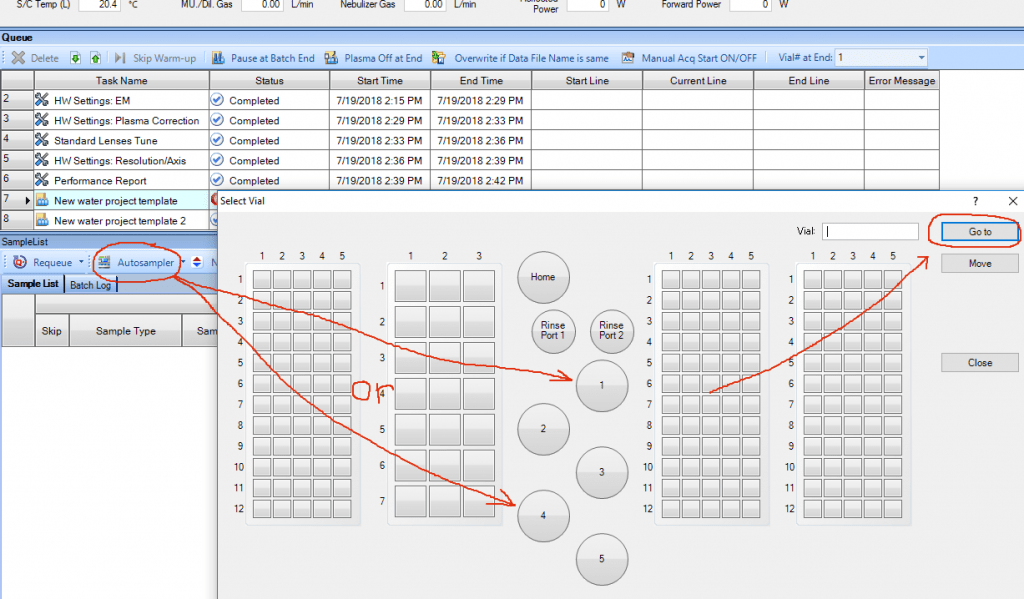
Move the autosampler probe to the wash acid or the DI water bottle.

Turn on the chiller.

Click on the Plasma icon to bring up the startup tuning procedures list. In general, make sure the first six are checked, and the others are not. If you are getting ready for laser work, check the P/A Factor box too, and be sure to have the P/A solution in a rack in position 2107 (or change that to a different position).

Click on the Plasma menu triangle, and the Plasma On button.

Be sure the check box is checked, and push the OK button.
The peristaltic pump will start.
The plasma will light.
After a warmup time, the tuning procedures will be done.
The process is done when the last tuning procedure is finished. that takes about 25 minutes.
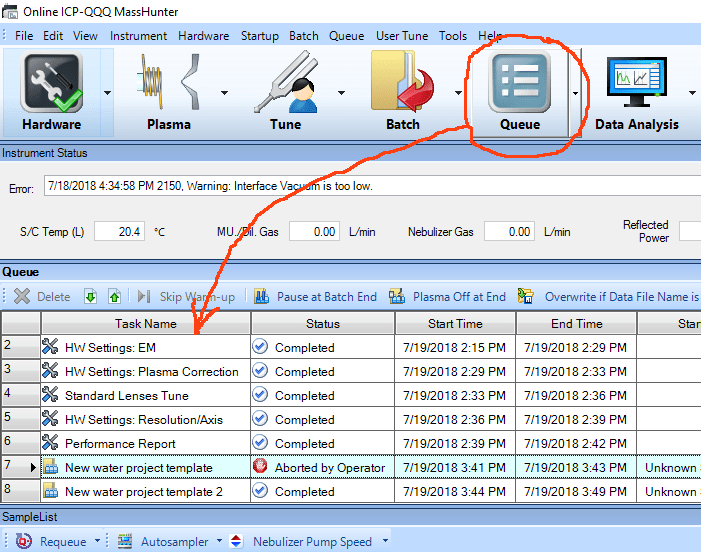
To see the tuning procedures, press the Queue button. Delete all Queue items from previous days. If the Queue window is too small, you can enlarge it so you can see the whole list of queued procedures.
There are pumping and warmup delays built into the system. If the perstaltic pump isn’t running and plasma hasn’t lit after three minutes or so, something is wrong.
When the last Queue procedure is done, you can run your samples. While waiting, you can check or set up your batch.
