This stage system can heat the sample up to 1200°C, in air, vacuum, or surrounded by a non-flammable, non-corrosive gas like nitrogen or argon. Note that we don’t have all the parts for all operational modes. Overpressures of up to 2 bars are OK, but the pressure relief valve operates at 3 bars. Here’s the instruction manual.
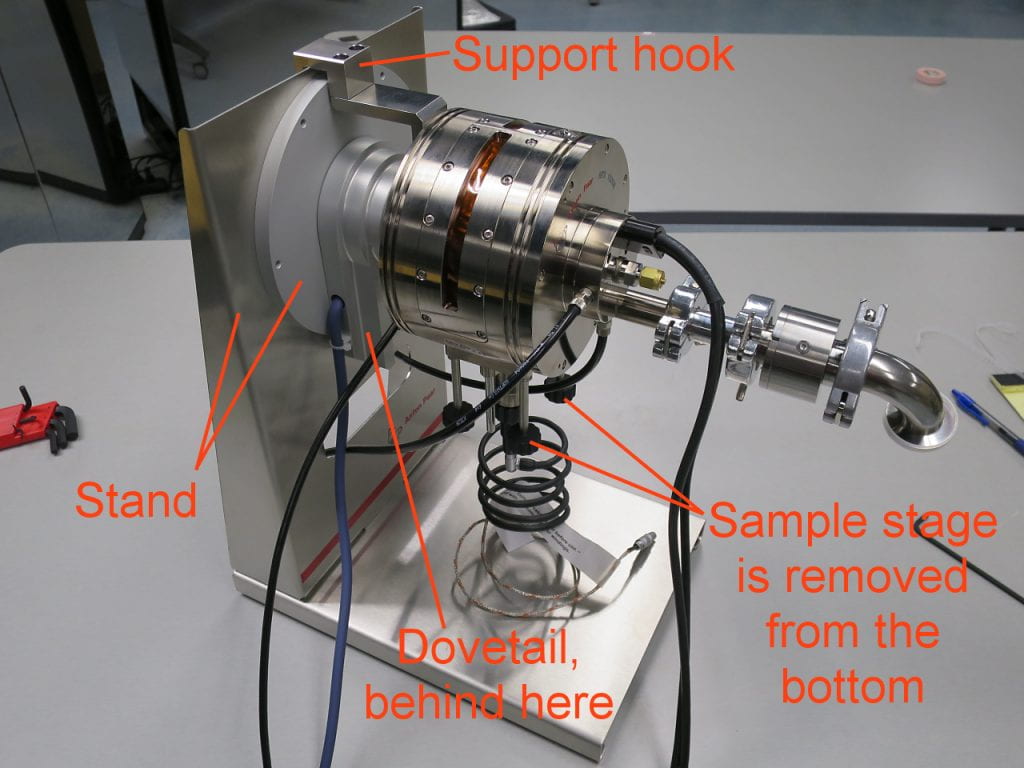
This oven is particularly heavy and awkward to handle, shown here with its full set of vacuum fittings sticking out to the right. It should stay on its stand until being mounted onto the goniometer hub. The oven has the usual dovetail for the goniometer hub, but it also has a support hook on top, to carry some of the weight.

These vacuum fittings were removed to make the oven lighter and easier to handle. They are stored with the rest of the oven, and are easy to put back on.
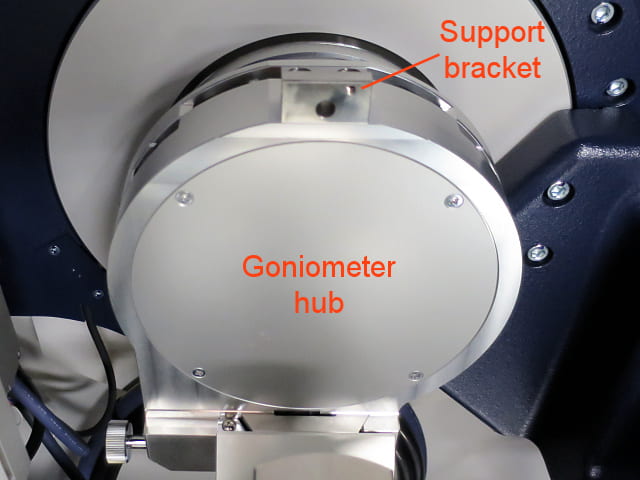
This shows the goniometer hub, with the support bracket that the oven support hook fits over.

To put the oven into the XRD, remove the two retaining bolts shown. The oven won’t fall off because it will be held by the support hook. The oven can be lifted off the stand, and mounted on the goniometer dovetail. Watch out for the fragile Kapton windows!
The stage is accessed from the bottom.
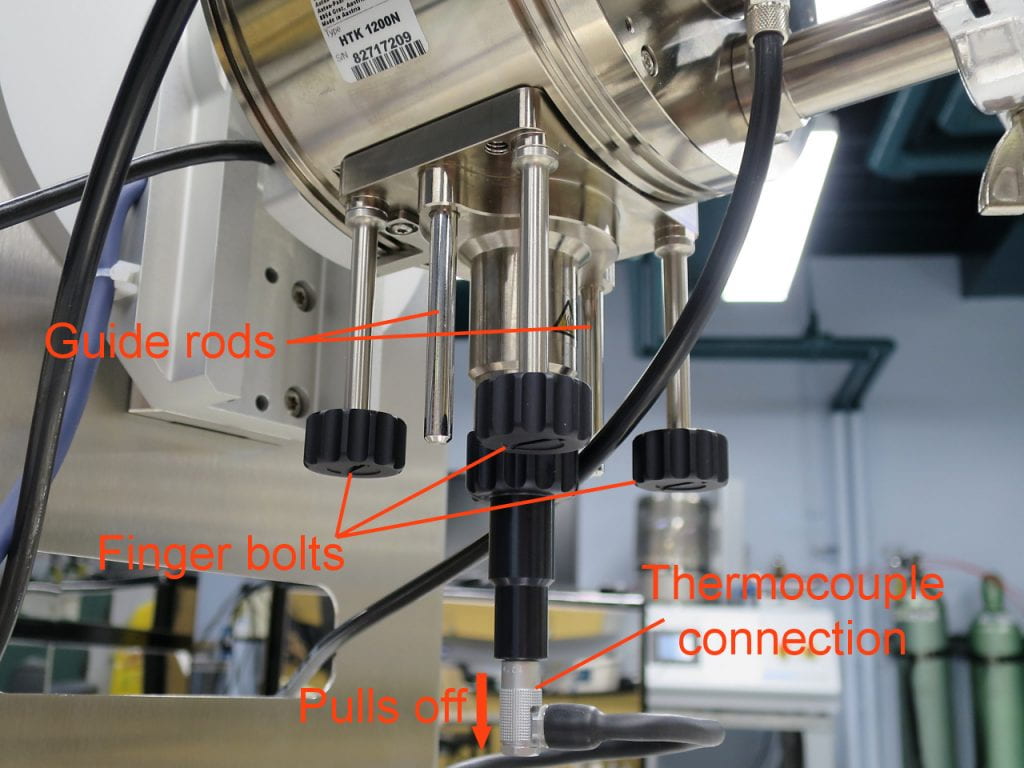
- Disconnect the thermocouple wire by pulling it off.
- While supporting the stage bottom with one hand, undo the four finger bolts with the other.
- Slide the stage assembly down along the guide rods. Take care not to jiggle it and spill your sample.
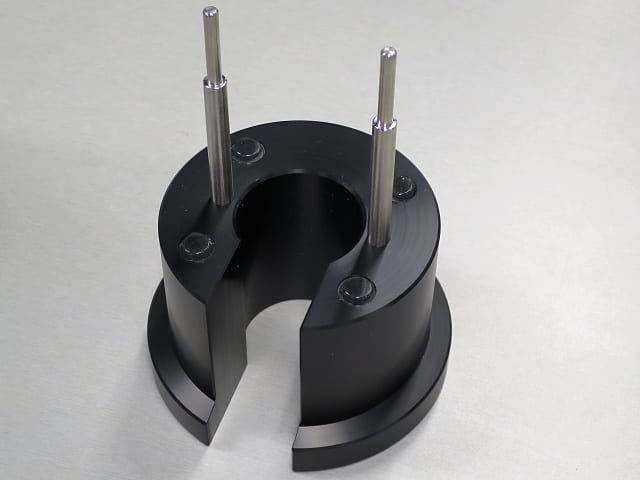
This thing holds the stage assembly so you can replace the sample. The metal rods slide through the holes that the guide rods went through.

The stage assembly on its holder. The sample is held in a sintered alumina cup, which is held onto an alumina post with an alumina retaining ring. All of these are extremely fragile, especially the retaining ring. They don’t look cheap, either.
To make sure the assembly stands level, be sure the finger bolts are threaded in to their stops.

These are the things that are usually connected to the Parr 1200 oven.
- Thermocouple wire.
- Cooling water hoses.
- Power connector.
- Ancillary connector (overtemperature?).
- Stage cable connector.
1 and 4 connect to a black box inside the XRD housing, shown here.
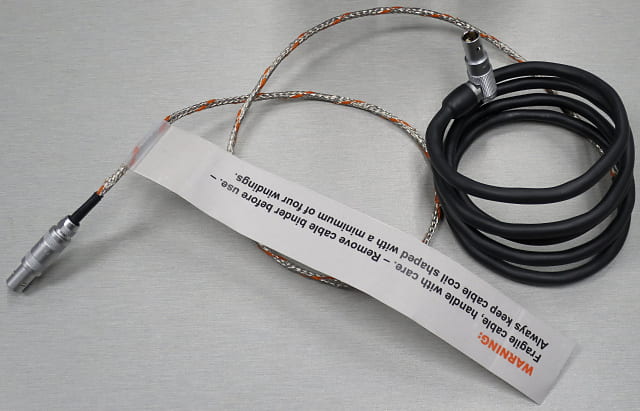
This is the thermocouple wire. The L-shaped end connects to the stage assembly, the straight end connects to the black box inside the XRD. Among other things, this is what the warning label says:
“WARNING: Fragile cable, handle with care.” Please do so.

These are the wires and hoses inside the XRD, for the Parr 1200 oven. They are too badly obscured to label easily, but you’ll figure it out. The beige cable D-connector is for the turbo pump vacuum gauge, if you use it.
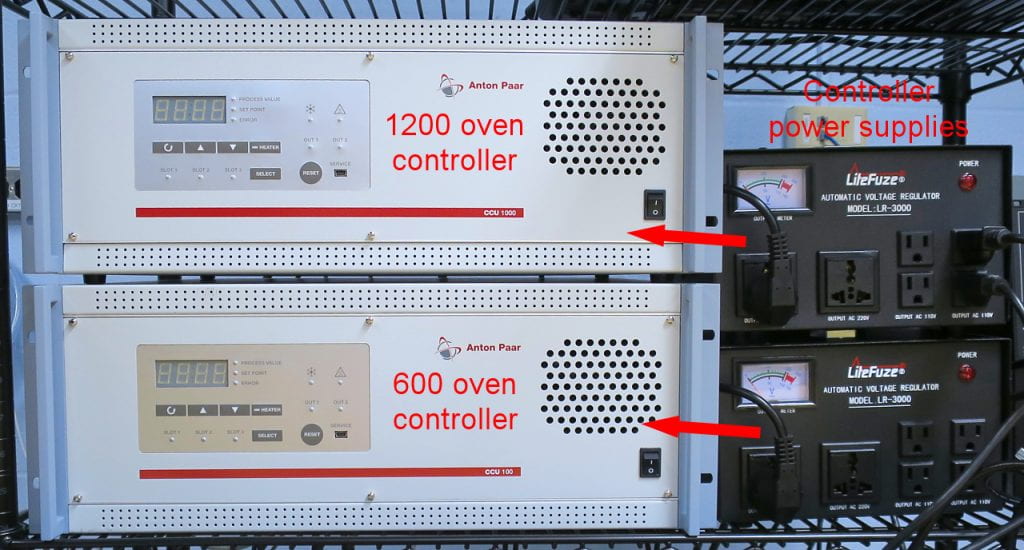
The top controller and power supply is for the Parr 1200 oven (CCU-1000). The power supply switch is on the back, whereas the controller switch is on the front. The two right-hand power cables on the right side of the top power supply go to the turbo pump power supply and controller. If you want to use the turbo pump with the Parr 600 oven, switch the two plugs to the bottom power supply.

Both ovens have water cooling, and the controllers won’t turn on the heaters if the water isn’t flowing. If you look at the plywood panel with the water valves, you’ll see the flow sensor switch. There is only one of them, so its wire has to be connected to the controller box for the oven you are using. In this case, the top controller box. Make sure the wire is plugged in to the correct port.

This accessories box contains the alignment slit, needed each time the oven is mounted, some hose fittings and vacuum grease, tools, an extra sample holder, and replacement Kapton and graphite foils. Apparently, the alignment slit is not actually needed. You align the optics with the normal stage prior to mounting the oven, then do a Z and ω alignment once the oven is mounted and the sample is put in. See instructions.

Another accessories box contains more graphite and Kapton foils, and a sample holder and retaining ring.

The heavy metal base can also be used to hold the alumina sample cups while they are being worked on. However, I have my doubts that the raised lip around the sample holder will make your life easier.
